Seed Editor
| (44 intermediate revisions by one user not shown) | |||
| Line 1: | Line 1: | ||
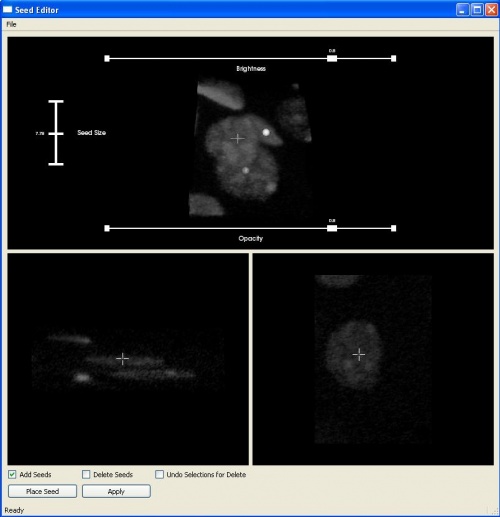
| − | + | Region Growing methods for image segmentation require a reasonable location of seed points. The location of seed points is usually the output of an algorithm and is used as an input to a segmentation routine. However, there might be errors in the seed detection process. Sometimes, a seed may not be detected at all and at other times there might be more than one seed detected for a region. This will result in an incorrect segmentation. It would be useful to have a viewer/editor for 3-D microscopy images which enables the user to view the location of the seeds and edit them if necessary. The Seed Editor allows the user to perform these operations in 3D.The Seed Editor contains 3 views with synchronized handles (crosshairs). If a handle is moved in one view, it also moves in the other two views such that all the three handles point to the same location in different views. | |
| − | + | ||
| − | + | ==Viewing the Seeds == | |
| − | 1. The first view allows the user to view the entire image in 3D along with the seeds. The user can rotate the | + | 1. The first view is the Volume view allows the user to view the entire image in 3D along with the seeds. The user can rotate the actor and explore the scene in view. There are 3 sliders in this view.The first slider allows the user to adjust the brightness of the image.The second slider allows the user to adjust the opacity of the image.The third slider allows the user to adjust the size of the seeds. These sliders help us to visualize the image better and let the user have control over the scene rendered. |
| − | The first slider allows the user to adjust the brightness of the image.The second slider allows the user to adjust the opacity of the image.The third slider allows the user to adjust the size of the seeds. These sliders help us to visualize the image better and let the user have control over the scene rendered. | + | |
| − | 2. The second view (bottom left) is the YZ | + | 2. The second view (bottom left) is the YZ or the Sagittal view at the location of the handle. This view is updated whenever the handle in the Volume view or Axial view moves to a new point. |
| − | 3. The third view (bottom right) is the XY | + | 3. The third view (bottom right) is the XY or the Axial view at the location of the handle.This view is updated whenever the handle in the Volume view or Sagittal view moves to a new point. |
| + | |||
| + | [[Image:SeedEditor_Views.JPG |thumb|500px|Click on the image to enlarge|center]] | ||
| + | |||
| + | ==Seed File Format== | ||
| + | |||
| + | The format for the seed file is simply the x, y z co-ordinates of the seed points. | ||
| + | //Comment: x coordinate, y coordinate, z coordinate | ||
| + | 25 35 1 | ||
| + | 22 33 12 | ||
| + | ........ | ||
| + | |||
| + | ==Open Image & Seed (Location) File== | ||
| + | |||
| + | After building FARSIGHT and navigating to the Seed Editor module, the user should double click the SeedEditor.exe file which displays the graphical user interface. After the GUI pops up, the user can load the image and the seed file by clicking the "Load Image and Seed File" option in the File Menu. The system opens a file browser using which the user can select the Image. After selecting the image, the system displays another file browser using which the user can select the text file containing the seeds. If the user selected valid files, all the three views are displayed. | ||
| + | |||
| + | == Editing the Seeds == | ||
| + | |||
| + | The Seed Editor allows the user to Add and Delete Seeds. | ||
| + | |||
| + | ===Adding Seeds=== | ||
| + | After selecting the "Add Seeds" checkbox, the Seed Editor enters into the Add mode. The user can then use the handles in the Sagittal and Axial views to place the seeds and then click the [APPLY] button to apply the changes. After clicking the [PLACE SEED] button, the seed appears as a sphere in the image at the location. [[Image:SeedEditor_Place_Seed.JPG |thumb|300px|center|Click on the image to enlarge|left]] To differentiate between the newly added seeds and the original seeds, the inital color of the seed is green. [[Image:SeedEditor_Place_Seed_alt_view.JPG |thumb|300px|center|This image shows a zoomed in close up volume view of the same seed.(Click on the image to enlarge)|center]] Once, the user clicks the [APPLY] button, the seed color changes to grey and there is no longer any difference between the seed placed by the user and the original set of seeds. [[Image:SeedEditor_Apply.JPG |thumb|300px|center|After the [APPLY] button is clicked, the seed is permanently placed and we cannot differentiate between the original seeds and the seed placed by the user.(Click on the image to enlarge)|right]] | ||
| + | |||
| + | ===Deleting Seeds=== | ||
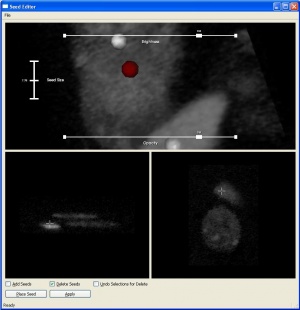
| + | After selecting the "Delete Seeds" checkbox, the Seed Editor enters into the Delete mode. The user can then click the seeds in the Volume view to delete them. However, these seeds are not immediately deleted from the picture to prevent any accidental deletions by the user. After clicking the seeds, the seed color changes to red. | ||
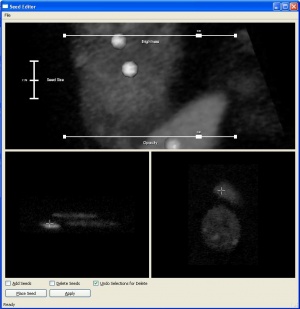
| + | [[Image:Seed_Editor_Delete.JPG |thumb|300px|center| Click on the image to enlarge|center]] Once, the user clicks the [APPLY] button, the seeds are deleted permanently from the image. If any seed is selected accidentally, the user can select the "Undo Selections for Delete" checkbox and click the seed again. This will undo the Delete operation.[[Image:Seed_Editor_Undo_Delete.JPG |thumb|300px|center| Click on the image to enlarge|center]] | ||
| + | |||
| + | ===Save Seeds=== | ||
| + | Once the user is satisified with the final set of seeds, the seeds can be saved by clicking the "Save Seeds" option in the File Menu. The system opens a file browser and the user can save the updated seed file in the desired location. | ||
Latest revision as of 04:04, 29 July 2009
Region Growing methods for image segmentation require a reasonable location of seed points. The location of seed points is usually the output of an algorithm and is used as an input to a segmentation routine. However, there might be errors in the seed detection process. Sometimes, a seed may not be detected at all and at other times there might be more than one seed detected for a region. This will result in an incorrect segmentation. It would be useful to have a viewer/editor for 3-D microscopy images which enables the user to view the location of the seeds and edit them if necessary. The Seed Editor allows the user to perform these operations in 3D.The Seed Editor contains 3 views with synchronized handles (crosshairs). If a handle is moved in one view, it also moves in the other two views such that all the three handles point to the same location in different views.
Contents |
Viewing the Seeds
1. The first view is the Volume view allows the user to view the entire image in 3D along with the seeds. The user can rotate the actor and explore the scene in view. There are 3 sliders in this view.The first slider allows the user to adjust the brightness of the image.The second slider allows the user to adjust the opacity of the image.The third slider allows the user to adjust the size of the seeds. These sliders help us to visualize the image better and let the user have control over the scene rendered.
2. The second view (bottom left) is the YZ or the Sagittal view at the location of the handle. This view is updated whenever the handle in the Volume view or Axial view moves to a new point.
3. The third view (bottom right) is the XY or the Axial view at the location of the handle.This view is updated whenever the handle in the Volume view or Sagittal view moves to a new point.
Seed File Format
The format for the seed file is simply the x, y z co-ordinates of the seed points.
//Comment: x coordinate, y coordinate, z coordinate
25 35 1
22 33 12
........
Open Image & Seed (Location) File
After building FARSIGHT and navigating to the Seed Editor module, the user should double click the SeedEditor.exe file which displays the graphical user interface. After the GUI pops up, the user can load the image and the seed file by clicking the "Load Image and Seed File" option in the File Menu. The system opens a file browser using which the user can select the Image. After selecting the image, the system displays another file browser using which the user can select the text file containing the seeds. If the user selected valid files, all the three views are displayed.
Editing the Seeds
The Seed Editor allows the user to Add and Delete Seeds.
Adding Seeds
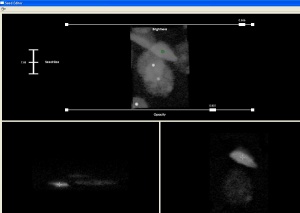
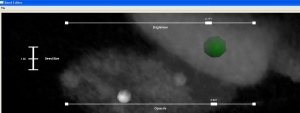
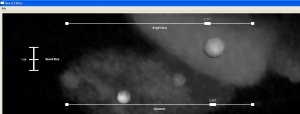
After selecting the "Add Seeds" checkbox, the Seed Editor enters into the Add mode. The user can then use the handles in the Sagittal and Axial views to place the seeds and then click the [APPLY] button to apply the changes. After clicking the [PLACE SEED] button, the seed appears as a sphere in the image at the location. To differentiate between the newly added seeds and the original seeds, the inital color of the seed is green. Once, the user clicks the [APPLY] button, the seed color changes to grey and there is no longer any difference between the seed placed by the user and the original set of seeds.Deleting Seeds
After selecting the "Delete Seeds" checkbox, the Seed Editor enters into the Delete mode. The user can then click the seeds in the Volume view to delete them. However, these seeds are not immediately deleted from the picture to prevent any accidental deletions by the user. After clicking the seeds, the seed color changes to red.
Once, the user clicks the [APPLY] button, the seeds are deleted permanently from the image. If any seed is selected accidentally, the user can select the "Undo Selections for Delete" checkbox and click the seed again. This will undo the Delete operation.Save Seeds
Once the user is satisified with the final set of seeds, the seeds can be saved by clicking the "Save Seeds" option in the File Menu. The system opens a file browser and the user can save the updated seed file in the desired location.
