FARSIGHT HowToBuild
(→Download FARSIGHT source code) |
Audreys247 (Talk | contribs) |
||
| Line 1: | Line 1: | ||
| − | == Starting a Fresh Developer's Build== | + | == Starting a Fresh Developer's Build == |
| − | When building FARSIGHT for the first time you will need to set up a development environment. FARSIGHT utilizes several large source libraries so ensure that you have at least | + | When building FARSIGHT for the first time you will need to set up a development environment. FARSIGHT utilizes several large source libraries so ensure that you have at least 25 GiB of HDD space. For conformity purposes, save the FARSIGHT source code, QT, VXL, ITK, and VTK to C:\Lab (if possible). The following instructions will assume that the source codes will be saved in C:\Lab. |
| − | |||
| − | For | + | === Choose a Compiler For Your OS === |
| + | Popular choices are gcc/g++ on Linux, Microsoft Visual Studio 2008/2010 on Windows, and XCode* on Mac OS X. | ||
| − | = | + | <span style="font-size:75%">*To install XCode/gcc on Mac OS X you may need to install the XCode development environment. This software should be available on your OS reinstall/recovery disk. At this time only XCode 3.2 is supported as CMake still does not generate appropriate project files for XCode 4</span> |
| − | + | ||
| − | + | ||
=== Install CMake === | === Install CMake === | ||
| − | CMake is | + | CMake is a tool which generates the makefiles under Linux, the Visual Studio Solution files (.sln) under Windows, or the XCode project files (.xcodeproj) under Mac OS X. It aims to allow developers to build their projects across different platforms with a minimum of reconfiguration. |
| − | + | ||
| − | + | <span style="font-size:125%; color:red">Note: If you want to take advantage of multicore building in Visual Studio, you can append /MP'''n''', where '''n''' is the number of processors you have. (ie. /MP16 for the Dell T5500 Workstations in the lab) to CMAKE_C_FLAGS and CMAKE_CXX_FLAGS at each CMake configuration screen.</span> | |
| − | + | To check the number of processors your computer has, call up the command prompt, type <tt>"echo NUMBER_OF_PROCESSORS"</tt>, and the next line will result in a number. Using a number greater than the number of processors you have will seriously slow down the computer. | |
=== Build or install Qt === | === Build or install Qt === | ||
| − | + | # Build Qt from source. Download it from here: [http://get.qt.nokia.com/qt/source/qt-everywhere-opensource-src-4.7.3.zip Windows Qt source code]. [http://get.qt.nokia.com/qt/source/qt-everywhere-opensource-src-4.7.3.tar.gz Linux/Mac Qt source code]. | |
| + | # Extract the zip file to C:\Lab (or the directory of your choosing). | ||
| + | # If you want to take advantage of multicore building QT, simply open up <QT root directory>\mkspecs\win32-msvc2008\qmake.conf and add [[#Install_CMake|-MP<number of processors>]] to the end of QMAKE_CFLAGS | ||
| − | + | [[Image:QTmulticore.jpg|center|frame|none|alt=alt text|Multicore building QT (-MP16 represents 16 processors)]] | |
| − | + | For Visual Studio 2008/2010: | |
| − | + | # Go to Start->All Programs->Microsoft Visual Studio 2008->Visual Studio Tools->Visual Studio 2008 x64 Win64 Command Prompt | |
| − | + | # cd to the directory where you unzipped the QT source (Auto-complete key: tab) [[Image:changeDrive.jpg|center|frame|alt=alt text|Go to the QT root directory in the Visual Studio 2008 x64 Win64 command prompt.]] | |
| − | + | # Run <tt>"configure"</tt> (see figure below) <span style="color:blue">(This should take about 5 minutes or more. [http://slashdot.org/ Reading material as you wait.])</span> <center>[[Image:QTacceptlicense.jpg|Configure]] [[Image:QTconfiguredone2.jpg|Configuring done, now nmake]] [[Image: QTnmakefinish.jpg|The command prompt should look like this after nmake completes.]]</center> | |
| − | + | # Run <tt>"nmake"</tt> <span style="color:blue">[http://en.wikipedia.org/wiki/Coffee Take a coffee break.]</span> This step will take at least 30 minutes. | |
| − | + | #*If you made a mistake somewhere, you can start from scratch by typing <tt>"nmake confclean"</tt> | |
| − | + | ||
| − | + | ||
| − | + | ||
| − | + | ||
| − | + | ||
| − | + | ||
| − | + | ||
| − | + | ||
| − | + | ||
| − | + | ||
| − | + | ||
=== Download Boost === | === Download Boost === | ||
| − | Download the Boost C++ libraries from [http:// | + | # Download the Boost C++ libraries from [http://sourceforge.net/projects/boost/files/boost/1.47.0/ the Boost download page]. |
| + | #*Make sure you download the actual source file and not the documentation (The documentation will have pdf in its name.) [[Image: boostDownload.jpg|center|frame|[http://sourceforge.net/projects/boost/files/boost/1.47.0/ Boost download page]]] | ||
| + | # Unzip it to C:\Lab (or a directory of your choosing). | ||
| + | |||
| + | You '''do not''' need to compile it. | ||
| + | |||
| + | === Download Git === | ||
| + | |||
| + | http://git-scm.com/ | ||
=== Install Subversion === | === Install Subversion === | ||
SVN is a version control system used to manage the source code. | SVN is a version control system used to manage the source code. | ||
| − | [http://tortoisesvn.net/ TortoiseSVN] | + | [http://tortoisesvn.net/ TortoiseSVN x64] is a popular choice for Windows that integrates into the OS. |
| − | + | Additional source libraries require [http://git-scm.com/ GIT] | |
| − | + | [[Image:TortoiseSVN.jpg|center|frame|[http://tortoisesvn.net/ Download the latest TortoiseSVN x64]]] | |
=== Download FARSIGHT source code === | === Download FARSIGHT source code === | ||
| + | # Go to C:\Lab | ||
| + | # Right-click to view the folder menu. | ||
| + | # Click <tt>SVN Checkout</tt> and a window will pop up. | ||
You can check out a copy of FARSIGHT from the following location: | You can check out a copy of FARSIGHT from the following location: | ||
| Line 62: | Line 62: | ||
https://farsight-svn.ee.uh.edu/repos/farsight/ | https://farsight-svn.ee.uh.edu/repos/farsight/ | ||
| − | + | [[Image:svncheckoutFarsight.jpg|center|frame|SVN Checkout Farsight to the desired folder.]] | |
The old Repository is locked to changes as of 2/17/2011 | The old Repository is locked to changes as of 2/17/2011 | ||
svn://www.openworld.rpi.edu/repos/farsight | svn://www.openworld.rpi.edu/repos/farsight | ||
| − | The | + | The main line of development is in the "trunk" subdirectory. If you're not interested in downloading test data or branch versions, you can download only the source code by appending "/trunk" to the above path. |
| − | + | https://farsight-svn.ee.uh.edu/repos/farsight/trunk | |
| − | + | [[Image:DownloadFarsightfinish.jpg|center|TortoiseSVN]] | |
| − | + | ||
| − | + | After all libraries and source codes have been downloaded, continue with the instructions below: | |
| − | + | ||
| − | + | == SuperBuild Instructions == | |
| − | + | Superbuild has been deprecated. Don't ask for it. | |
| − | + | ||
| − | + | ||
| − | + | ||
| − | + | ||
| − | + | ||
== Manual Source Libraries Configuration == | == Manual Source Libraries Configuration == | ||
| − | |||
=== Build VXL === | === Build VXL === | ||
| − | Download the latest stable release of VXL from [http://vxl.sourceforge.net/ Vision-something-Libraries] | + | # Download the latest stable release of VXL from [http://vxl.sourceforge.net/ Vision-something-Libraries]. [[Image:downloadVXL.jpg|center|frame|[http://vxl.sourceforge.net/ VXL download page]]] |
| + | # Unzip the file to C:\Lab. | ||
| + | # Run CMake. | ||
| + | # Specify the source folder and binary folder. | ||
| + | # <tt>Configure</tt> | ||
| + | # Specify the generator for this project: <tt>Visual Studio 9 2008 Win64</tt> | ||
| + | # (optional) For speed optimization in Visual Studio, append [[#Install_CMake|-MP<number of processors>]] to CMAKE_C_FLAGS and CMAKE_CXX_FLAGS as shown in the figure to the right. [[Image: CmakeVXLmulticore.jpg|right|thumb|Multicore building VXL]] | ||
| + | # Turn the following options <span style="color:red">OFF</span>: | ||
| + | #*<span style="color:red">BUILD_BRL</span> | ||
| + | #*<span style="color:red">BUILD_CONVERSIONS</span> | ||
| + | #*<span style="color:red">BUILD_EXAMPLES</span> | ||
| + | #*<span style="color:red">BUILD_GEL</span> | ||
| + | #*<span style="color:red">BUILD_OUL</span> | ||
| + | #*<span style="color:red">BUILD_OXL</span> | ||
| + | #*<span style="color:red">BUILD_PRIP</span> | ||
| + | #*<span style="color:red">BUILD_TBL</span> | ||
| + | #*<span style="color:red">BUILD_TESTING</span> [[Image: cmakevxl.jpg|right|thumb|CMake VXL]] | ||
| + | # Turn the following options <span style="color:green">ON</span>: | ||
| + | #*<span style="color:green">BUILD_RPL_RGTL</span> | ||
| + | # Click <tt>configure</tt> and then turn the following option <span style="color:green">ON</span>: | ||
| + | #*<span style="color:green">BUILD_RPL_RTVL</span> (will show up in pink) | ||
| + | # <tt>Configure</tt> again and then <tt>Generate</tt> | ||
| + | # Go to the VXL binary folder and open the solution file ('''vxl.sln'''). | ||
| + | # Go to the main menu bar: Build->Batch Build | ||
| + | # Turn ON the following options under ALL_BUILD: | ||
| + | #*Debug|x64 | ||
| + | #*Release|x64 [[Image: batchbuildvxl.jpg|center|frame|Batch Build VXL]] | ||
| + | #<tt>Build</tt> | ||
| + | # As you wait, [http://webdevrefinery.com/forums/topic/9459-funniest-programming-comics/ play some Starcraft 2.] | ||
| − | + | === Build ITKv4 === | |
| − | + | Download ITKv4 by going to: (Start -> Git Bash in search box). Then type the following lines: | |
| − | + | ||
| − | + | ||
| − | + | ||
| − | + | ||
| − | + | ||
| − | + | ||
| − | + | ||
| − | + | ||
| − | + | ''cd /c/Lab'' | |
| − | + | ||
| − | + | ||
| − | + | ||
| − | + | ||
| − | + | ||
| − | + | ||
| − | + | ''git clone git://itk.org/ITK.git'' | |
| − | + | ''cd ITK'' | |
| − | + | ''git checkout v4.0a09'' | |
| − | + | ''git submodule update'' | |
| − | + | ||
| − | + | ||
| − | + | ||
| − | + | [[File:downloadITK.jpg|center|ITK]] | |
| − | ''' | + | # Run CMake. |
| + | # Specify the source folder and binary folder. | ||
| + | # <tt>Configure</tt> | ||
| + | # Specify the generator for this project: <tt>Visual Studio 9 2008 Win64</tt> | ||
| + | # An error will show up in the CMake log complaining about BUILD_TESTING being on. | ||
| + | # (optional) For speed optimization in Visual Studio, append [[#Install_CMake|-MP<number of processors>]] to CMAKE_C_FLAGS and CMAKE_CXX_FLAGS as shown in the figure to the right. [[Image:ITKcmake.jpg|right|thumb|alt=alt text|Multicore building ITKv4. <span style="font-size:100%; color:red">Make sure you change the number according to the number of processors you have! (ie. /MP8)</span> ]] | ||
| + | # Turn <span style="color:red">OFF</span> the following: | ||
| + | #*<span style="color:red">BUILD_TESTING</span> | ||
| + | #*<span style="color:red">BUILD_EXAMPLES</span> | ||
| + | # <tt>Configure</tt> again. | ||
| + | # Turn <span style="color:green">ON</span> the following: | ||
| + | #*<span style="color:green">ITKGroup_* or ITK_BUILD_ALL_MODULES</span> | ||
| + | #*<span style="color:green">ITK_USE_64BITS_IDS</span> | ||
| + | #*<span style="color:green">ITK_USE_REVIEW</span> | ||
| + | #**'''Do NOT turn on ITK_USE_SYSTEM_VXL as documented in the old FARSIGHT_HowToBuild guide''' | ||
| + | # <tt>Configure</tt> again and then <tt>Generate</tt> | ||
| + | # Go to the ITK binary folder and open the solution file ('''ITK.sln'''). | ||
| + | # Go to the file toolbar: Build->Batch Build [[Image: batchbuildvxl.jpg|right|thumb|alt=alt text|Batch Build ITK]] | ||
| + | # Turn ON the following options under ALL_BUILD: | ||
| + | #*Debug|x64 | ||
| + | #*Release|x64 | ||
| + | #<tt>Build</tt> | ||
| + | # As you wait, [http://xkcd.com/303/ poke your neighbor.] | ||
| − | |||
| − | + | CMakeList files may need to be edited to use ${ITK_LIBRARIES} instead of ITKCommon, ITKIO, ITKBasicFilter.... etc, otherwise you will get errors like "Cannot open file: ITKCommon.lib" | |
| − | + | ||
| − | + | ||
| − | + | ||
| − | + | ||
| − | + | ||
| − | + | ||
| − | + | ||
| − | + | ||
| − | + | ||
| − | + | ||
| − | + | ||
See [[FARSIGHT_Tutorials/Building_Software]] if you'd like to enable Python wrapping for ITK. | See [[FARSIGHT_Tutorials/Building_Software]] if you'd like to enable Python wrapping for ITK. | ||
| Line 142: | Line 156: | ||
=== Build VTK === | === Build VTK === | ||
| − | Download the source code from the [http://vtk.org/VTK/resources/software.html VTK download page] | + | # Download the source code from the [http://vtk.org/VTK/resources/software.html VTK download page] |
| − | + | #*(Alternatively, you can access the latest development version of VTK using git. This will allow you to use some additional Qt views in FARSIGHT, but the git version of VTK is less stable than the latest release. Instructions on how to access the VTK git repository are on the same VTK download page linked above.) | |
| − | Alternatively, you can access the latest development version of VTK using git. This will allow you to use some additional Qt views in FARSIGHT, but the git version of VTK is less stable than the latest release. Instructions on how to access the VTK git repository are on the same VTK download page linked above. | + | #*<span style="font-size:150%; color:red">If you want to run TraceEditor, you MUST [[HowToBuild_VTK_nightly|build the VTK nightly via GIT]].</span> [[Image: downloadVTK.jpg|center|frame|[http://vtk.org/VTK/resources/software.html VTK download page]]]. |
| − | + | # Create a VTK folder in C:\Lab and extract the VTK zip file into it. | |
| − | + | # Run CMake. | |
| − | + | # Specify the source folder and the binary folder. | |
| − | | | + | # <tt>Configure</tt> |
| − | | | + | # Specify the generator for this project: <tt>Visual Studio 9 2008 Win64</tt> |
| − | + | # (optional) For speed optimization in Visual Studio, append [[#Install_CMake|-MP<number of processors>]] to CMAKE_C_FLAGS and CMAKE_CXX_FLAGS as shown in the figure to the right. [[Image: CMAKEVTK.jpg|right|thumb|Multicore building VTK]] | |
| − | + | # Turn <span style="color:red">OFF</span> the following options: | |
| − | + | #*<span style="color:red">BUILD_DOCUMENTATION</span> | |
| − | + | #*<span style="color:red">BUILD_EXAMPLES</span> | |
| − | + | #*<span style="color:red">BUILD_SHARED_LIBS</span> | |
| − | + | #*<span style="color:red">BUILD_TESTING</span> | |
| − | + | # Turn <span style="color:green">ON</span> the following options: | |
| − | |- | + | #*<span style="color:green">VTK_USE_BOOST</span> |
| − | | | + | #*<span style="color:green">VTK_USE_GUISUPPORT</span> |
| − | | | + | #*<span style="color:green">VTK_USE_QT</span> |
| − | | | + | # <tt>Configure</tt> |
| − | + | # If you are '''building VTK nightly''' via GIT, turn <span style="color:green">ON</span> the following option: | |
| − | + | #*<span style="color:green">VTK_USE_QTCHARTS | |
| − | + | # <tt>Configure</tt> | |
| − | + | #*An error may appear about QT_QMAKE_EXECUTABLE not being found. Simply provide the path to qmake.exe (should be <QT root directory>/bin/qmake.exe) | |
| − | + | # <tt>Generate</tt> | |
| − | + | # Go to the VTK binary folder and open the solution file ('''VTK.sln'''). | |
| − | + | # Go to the file toolbar: Build->Batch Build [[Image: batchbuildvxl.jpg|right|thumb|alt=alt text|Batch Build VTK]] | |
| − | + | # Turn ON the following options under ALL_BUILD: | |
| − | + | #*Debug|x64 | |
| − | + | #*Release|x64 | |
| − | + | #<tt>Build</tt> | |
| − | + | # As you wait, [http://xkcd.com/323/ take a nice long shower.] | |
| − | + | ||
| − | + | ||
| − | + | ||
| − | + | ||
| − | + | ||
| − | + | ||
| − | + | ||
| − | + | ||
| − | + | ||
| − | + | ||
| − | + | ||
| − | + | ||
| − | + | ||
| − | + | ||
| − | + | ||
| − | + | ||
| − | + | ||
| − | + | ||
| − | + | ||
| − | + | ||
| − | + | ||
| − | + | ||
| − | + | ||
| − | + | ||
| − | + | ||
| − | + | ||
| − | + | ||
| − | + | ||
| − | + | ||
| − | + | ||
| − | + | ||
| − | + | ||
| − | + | ||
| − | + | ||
| − | + | ||
| − | + | ||
| − | If | + | |
| − | + | ||
| − | = | + | |
| − | + | ||
| − | + | ||
| − | + | ||
| − | + | ||
| − | + | ||
| − | + | ||
| − | + | ||
| − | + | ||
| − | + | ||
| − | + | ||
| − | + | ||
| − | + | ||
| − | + | ||
| − | + | ||
| − | + | ||
| − | + | ||
| − | + | ||
| − | = | + | |
| − | + | ||
| − | + | ||
| − | + | ||
| − | + | ||
| − | + | ||
| − | + | ||
| − | + | == Build FARSIGHT == | |
| − | + | ||
| − | + | ||
| − | + | ||
| − | *THE PACKAGE project does not build automatically, but can be selected and build. | + | # Run CMake. |
| − | **It requires some type of platform specific program for creating install packages. | + | # Specify the source folder and the binary folder. |
| − | ***Build PACKAGE to create an install file of Farsight. | + | # <tt>Configure</tt> |
| + | # Set your desired modules to ON. CMake will then tell you if you are missing any libraries. | ||
| + | #* Some modules need glut. Therefore, set the desired locations properly for: | ||
| + | #**GLUT_INCLUDE_DIR, (ex: C:/Program Files/Microsoft Visual Studio 8/VC/PlatformSDK/Include/gl) | ||
| + | #**and GLUT_glut_LIBRARY (ex: C:/Program Files/Microsoft Visual Studio 8/VC/PlatformSDK/Include/gl/glut32.lib) | ||
| + | #* If FTKImage fails to build, go to: | ||
| + | #**properties | ||
| + | #***configuration properties | ||
| + | #****C/C++ and under 'Additional options:' add "/bigobj: | ||
| + | #*THE PACKAGE project does not build automatically, but can be selected and build. | ||
| + | #**It requires some type of platform specific program for creating install packages. | ||
| + | #***Build PACKAGE to create an install file of Farsight. | ||
Note: If running the executable results in the following error: | Note: If running the executable results in the following error: | ||
| Line 251: | Line 210: | ||
==Checking the Quality Dashboard== | ==Checking the Quality Dashboard== | ||
| − | When you start contributing code you can monitor if code and tests you build are compiling correctly on the dashboard machines here http://cdash.org/CDash/index.php?project=Farsight | + | When you start contributing code you can monitor if code and tests you build are compiling correctly on the dashboard machines here: http://cdash.org/CDash/index.php?project=Farsight |
| − | You can also submit an [[ Submitting_an_Experimental_Dashboard | experimental build ]] or set up [[ Setting_up_automated_builds | automated builds ]] | + | You can also submit an [[ Submitting_an_Experimental_Dashboard | experimental build ]] or set up [[ Setting_up_automated_builds | automated builds ]]. |
Revision as of 16:16, 31 August 2011
Contents |
Starting a Fresh Developer's Build
When building FARSIGHT for the first time you will need to set up a development environment. FARSIGHT utilizes several large source libraries so ensure that you have at least 25 GiB of HDD space. For conformity purposes, save the FARSIGHT source code, QT, VXL, ITK, and VTK to C:\Lab (if possible). The following instructions will assume that the source codes will be saved in C:\Lab.
Choose a Compiler For Your OS
Popular choices are gcc/g++ on Linux, Microsoft Visual Studio 2008/2010 on Windows, and XCode* on Mac OS X.
*To install XCode/gcc on Mac OS X you may need to install the XCode development environment. This software should be available on your OS reinstall/recovery disk. At this time only XCode 3.2 is supported as CMake still does not generate appropriate project files for XCode 4
Install CMake
CMake is a tool which generates the makefiles under Linux, the Visual Studio Solution files (.sln) under Windows, or the XCode project files (.xcodeproj) under Mac OS X. It aims to allow developers to build their projects across different platforms with a minimum of reconfiguration.
Note: If you want to take advantage of multicore building in Visual Studio, you can append /MPn, where n is the number of processors you have. (ie. /MP16 for the Dell T5500 Workstations in the lab) to CMAKE_C_FLAGS and CMAKE_CXX_FLAGS at each CMake configuration screen.
To check the number of processors your computer has, call up the command prompt, type "echo NUMBER_OF_PROCESSORS", and the next line will result in a number. Using a number greater than the number of processors you have will seriously slow down the computer.
Build or install Qt
- Build Qt from source. Download it from here: Windows Qt source code. Linux/Mac Qt source code.
- Extract the zip file to C:\Lab (or the directory of your choosing).
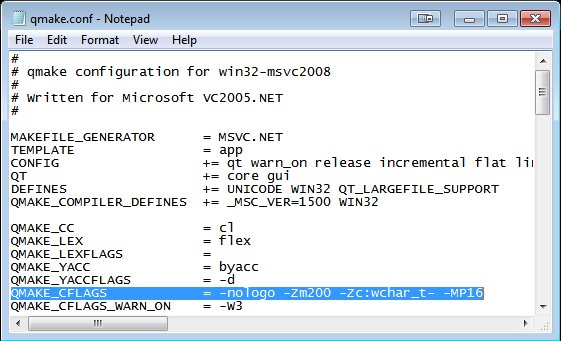
- If you want to take advantage of multicore building QT, simply open up <QT root directory>\mkspecs\win32-msvc2008\qmake.conf and add -MP<number of processors> to the end of QMAKE_CFLAGS
For Visual Studio 2008/2010:
- Go to Start->All Programs->Microsoft Visual Studio 2008->Visual Studio Tools->Visual Studio 2008 x64 Win64 Command Prompt
- cd to the directory where you unzipped the QT source (Auto-complete key: tab)
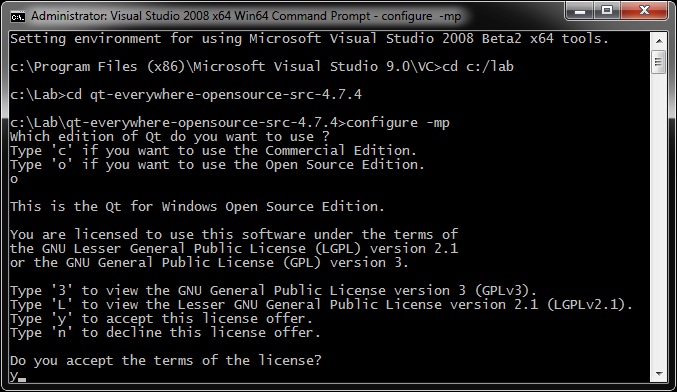
- Run "configure" (see figure below) (This should take about 5 minutes or more. Reading material as you wait.)
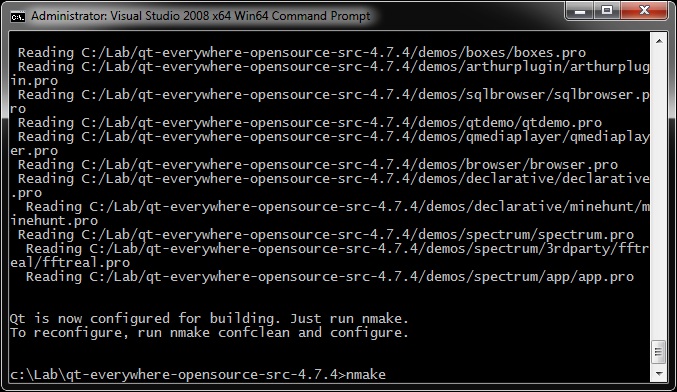
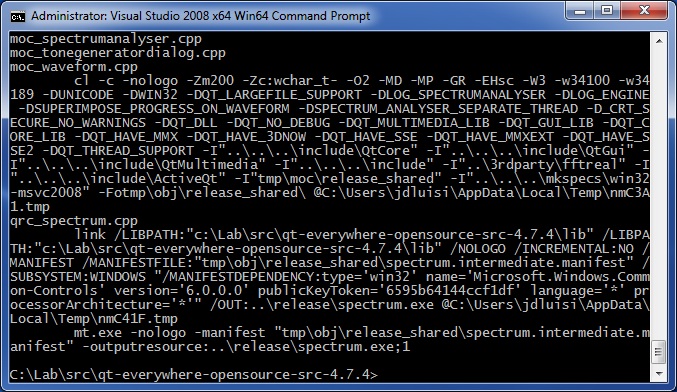
- Run "nmake" Take a coffee break. This step will take at least 30 minutes.
- If you made a mistake somewhere, you can start from scratch by typing "nmake confclean"
Download Boost
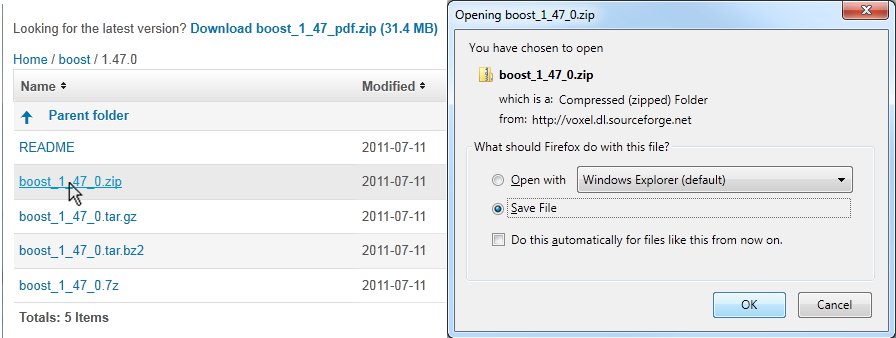
- Download the Boost C++ libraries from the Boost download page.
- Make sure you download the actual source file and not the documentation (The documentation will have pdf in its name.)
- Unzip it to C:\Lab (or a directory of your choosing).
You do not need to compile it.
Download Git
Install Subversion
SVN is a version control system used to manage the source code.
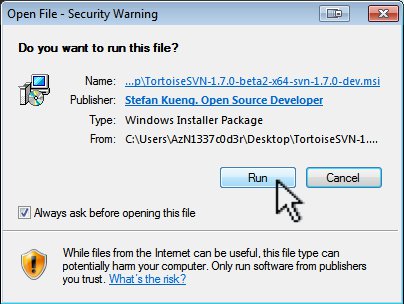
TortoiseSVN x64 is a popular choice for Windows that integrates into the OS.
Additional source libraries require GIT
Download FARSIGHT source code
- Go to C:\Lab
- Right-click to view the folder menu.
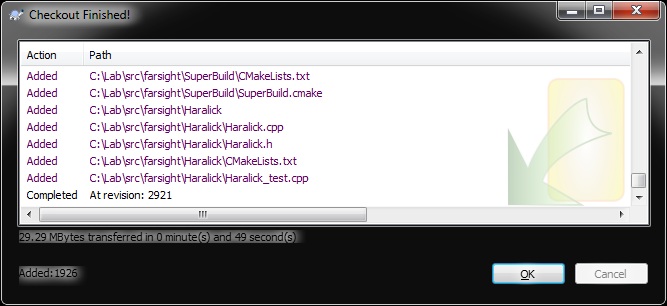
- Click SVN Checkout and a window will pop up.
You can check out a copy of FARSIGHT from the following location:
NEW SVN Repository is located at:
https://farsight-svn.ee.uh.edu/repos/farsight/
The old Repository is locked to changes as of 2/17/2011
svn://www.openworld.rpi.edu/repos/farsight
The main line of development is in the "trunk" subdirectory. If you're not interested in downloading test data or branch versions, you can download only the source code by appending "/trunk" to the above path.
https://farsight-svn.ee.uh.edu/repos/farsight/trunk
After all libraries and source codes have been downloaded, continue with the instructions below:
SuperBuild Instructions
Superbuild has been deprecated. Don't ask for it.
Manual Source Libraries Configuration
Build VXL
- Download the latest stable release of VXL from Vision-something-Libraries.
- Unzip the file to C:\Lab.
- Run CMake.
- Specify the source folder and binary folder.
- Configure
- Specify the generator for this project: Visual Studio 9 2008 Win64
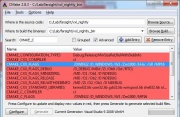
- (optional) For speed optimization in Visual Studio, append -MP<number of processors> to CMAKE_C_FLAGS and CMAKE_CXX_FLAGS as shown in the figure to the right.
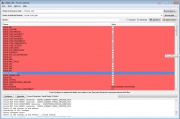
- Turn the following options OFF:
- BUILD_BRL
- BUILD_CONVERSIONS
- BUILD_EXAMPLES
- BUILD_GEL
- BUILD_OUL
- BUILD_OXL
- BUILD_PRIP
- BUILD_TBL
- BUILD_TESTING
- Turn the following options ON:
- BUILD_RPL_RGTL
- Click configure and then turn the following option ON:
- BUILD_RPL_RTVL (will show up in pink)
- Configure again and then Generate
- Go to the VXL binary folder and open the solution file (vxl.sln).
- Go to the main menu bar: Build->Batch Build
- Turn ON the following options under ALL_BUILD:
- Debug|x64
- Release|x64
- Build
- As you wait, play some Starcraft 2.
Build ITKv4
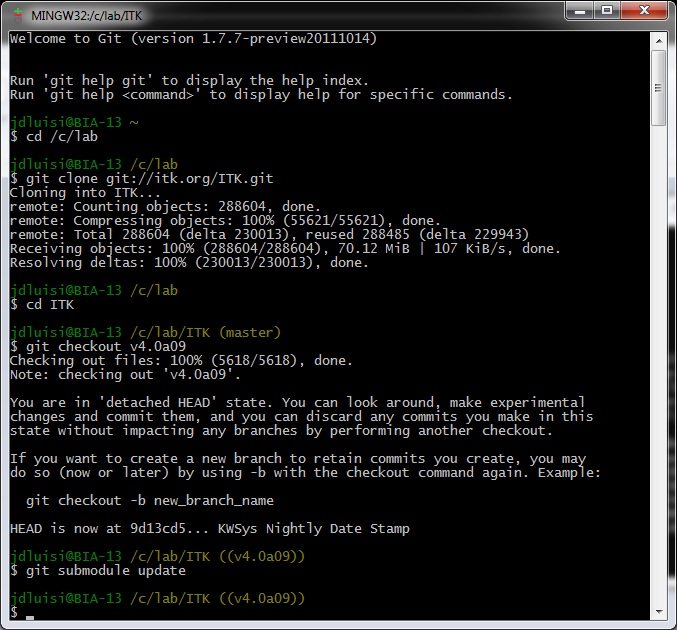
Download ITKv4 by going to: (Start -> Git Bash in search box). Then type the following lines:
cd /c/Lab

git clone git://itk.org/ITK.git
cd ITK
git checkout v4.0a09
git submodule update
- Run CMake.
- Specify the source folder and binary folder.
- Configure
- Specify the generator for this project: Visual Studio 9 2008 Win64
- An error will show up in the CMake log complaining about BUILD_TESTING being on.
- (optional) For speed optimization in Visual Studio, append -MP<number of processors> to CMAKE_C_FLAGS and CMAKE_CXX_FLAGS as shown in the figure to the right.
- Turn OFF the following:
- BUILD_TESTING
- BUILD_EXAMPLES
- Configure again.
- Turn ON the following:
- ITKGroup_* or ITK_BUILD_ALL_MODULES
- ITK_USE_64BITS_IDS
- ITK_USE_REVIEW
- Do NOT turn on ITK_USE_SYSTEM_VXL as documented in the old FARSIGHT_HowToBuild guide
- Configure again and then Generate
- Go to the ITK binary folder and open the solution file (ITK.sln).
- Go to the file toolbar: Build->Batch Build
- Turn ON the following options under ALL_BUILD:
- Debug|x64
- Release|x64
- Build
- As you wait, poke your neighbor.
CMakeList files may need to be edited to use ${ITK_LIBRARIES} instead of ITKCommon, ITKIO, ITKBasicFilter.... etc, otherwise you will get errors like "Cannot open file: ITKCommon.lib"
See FARSIGHT_Tutorials/Building_Software if you'd like to enable Python wrapping for ITK.
Build VTK
- Download the source code from the VTK download page
- (Alternatively, you can access the latest development version of VTK using git. This will allow you to use some additional Qt views in FARSIGHT, but the git version of VTK is less stable than the latest release. Instructions on how to access the VTK git repository are on the same VTK download page linked above.)
- If you want to run TraceEditor, you MUST build the VTK nightly via GIT. .
- Create a VTK folder in C:\Lab and extract the VTK zip file into it.
- Run CMake.
- Specify the source folder and the binary folder.
- Configure
- Specify the generator for this project: Visual Studio 9 2008 Win64
- (optional) For speed optimization in Visual Studio, append -MP<number of processors> to CMAKE_C_FLAGS and CMAKE_CXX_FLAGS as shown in the figure to the right.
- Turn OFF the following options:
- BUILD_DOCUMENTATION
- BUILD_EXAMPLES
- BUILD_SHARED_LIBS
- BUILD_TESTING
- Turn ON the following options:
- VTK_USE_BOOST
- VTK_USE_GUISUPPORT
- VTK_USE_QT
- Configure
- If you are building VTK nightly via GIT, turn ON the following option:
- VTK_USE_QTCHARTS
- Configure
- An error may appear about QT_QMAKE_EXECUTABLE not being found. Simply provide the path to qmake.exe (should be <QT root directory>/bin/qmake.exe)
- Generate
- Go to the VTK binary folder and open the solution file (VTK.sln).
- Go to the file toolbar: Build->Batch Build
- Turn ON the following options under ALL_BUILD:
- Debug|x64
- Release|x64
- Build
- As you wait, take a nice long shower.
Build FARSIGHT
- Run CMake.
- Specify the source folder and the binary folder.
- Configure
- Set your desired modules to ON. CMake will then tell you if you are missing any libraries.
- Some modules need glut. Therefore, set the desired locations properly for:
- GLUT_INCLUDE_DIR, (ex: C:/Program Files/Microsoft Visual Studio 8/VC/PlatformSDK/Include/gl)
- and GLUT_glut_LIBRARY (ex: C:/Program Files/Microsoft Visual Studio 8/VC/PlatformSDK/Include/gl/glut32.lib)
- If FTKImage fails to build, go to:
- properties
- configuration properties
- C/C++ and under 'Additional options:' add "/bigobj:
- configuration properties
- properties
- THE PACKAGE project does not build automatically, but can be selected and build.
- It requires some type of platform specific program for creating install packages.
- Build PACKAGE to create an install file of Farsight.
- It requires some type of platform specific program for creating install packages.
- Some modules need glut. Therefore, set the desired locations properly for:
Note: If running the executable results in the following error:
"QtGui4.dll was not found"
you may need to add the QT bin directory to the system path on your OS.
Checking the Quality Dashboard
When you start contributing code you can monitor if code and tests you build are compiling correctly on the dashboard machines here: http://cdash.org/CDash/index.php?project=Farsight
You can also submit an experimental build or set up automated builds .
