FARSIGHT Tutorials/Quick Start
Contents |
Details
- Goal: This tutorial is intended to show you how to use FARSIGHT basic operations
- Duration: 30 minutes
- Requisites: Basic familiarity with Python commands
- Materials: FARSIGHT Installed
Basics Concepts
Image Types
ITK requires users to be aware of the pixel type and dimension used by the images.
Typical pixel types and dimensions may be
| Image Type | Pixel Type | Dimension | pixel depth |
|---|---|---|---|
| IUC2 | unsigned char | 2 | 8 bits per pixel |
| IUC3 | unsigned char | 3 | 8 bits per pixel |
| IUS2 | unsigned short | 2 | 16 bits per pixel |
| IUS3 | unsigned short | 3 | 16 bits per pixel |
For the purpose of this tutorial session we will focus on using only two-dimensional images of 8bits per pixel. This is defined as IUC2.
Starting the Interpreter
The first thing you need to do is to start your Python interpreter
- In GNU/Linux and Mac this is done by simply typing "python" from within the X11 window
- In Windows this is done by launching from the Start menu the program "Python (command line)"
Once the command line window appears, type
import itk
This may take some seconds while the shared libraries are loaded.
Reading an image from a file and Showing it
Getting example image
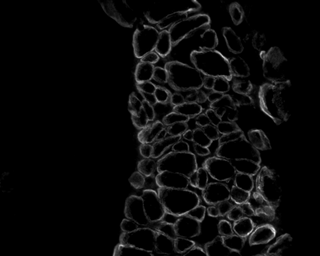
Download this image to your computer.
- First left-click on the image to go to its Wiki page
- Then right-click on the image and select the option "save link as".
Alternatively you could get this image from the ITK directory
Insight/Testing/Data/Input/CellsFluorescence1.png
- Save the image file in any directory, but remember what directory this is.
- Hereafter we will call pathToImages the full path to that directory where you put this image file.
One easy way to do this is to assign the path to a Python variable. For example I did in my system
pathToImages="D:/cygwin/home/ibanez/FarsightTutorial/Data"
Reading the image file
In order to read the image, please type the following commands
 reader1 = itk.ImageFileReader.IUC2.New(FileName=pathToImages+"/CellsFluorescence1.png")
 image1  = reader1.GetOutput()
The first line declares an ImageFileReader for 2D images of pixel type "unsigned char" (8bits per pixel), and provides the full path to the image file to read.
ITK supports multiple file formats, including
- TIFF
- JPEG
- PNG
- BioRad
Once the first line finish executing, and you get the prompt back, the image will have been read into memory.
The second line assigns the read image to the variable "image1".
This could be simplified by using the following Python function
  def readimage( imagetype, filename ):
    rd1 = itk.ImageFileReader[imagetype].New()
    rd1.SetFileName(filename)
    rd1.Update()
    image = rd1.GetOutput()
    return image
Showing an image
You can do a quick display of the image by typing the command
itk.show2D( image1 )
This will display the image in an newly open window
This is done by using the package imview
Writing an image to a file
Pick a directory where you want to put all the output images from this exercise. You may want this directory to be one where you can put messy output, since in the process of learning we will create, no doubt, some interesting disorder.
itk.write( image1, pathToImages+"/cells2.tiff")
This line will write the image represented in the variable "image1" to the file specified by a full path.
Smoothing an image
reader1 = itk.ImageFileReader.IF2.New(FileName=pathToImages+"/CellsFluorescence1.png")
image1 = reader1.GetOutput()
smoothingFilter = itk.SmoothingRecursiveGaussianImageFilter.IF2IF2.New()
smoothingFilter.SetInput( image1 )
smoothingFilter.SetSigma( 2.0 )
smoothingFilter.Update()
smoothedImage = smoothingFilter.GetOutput()
itk.write( smoothedImage, pathToImages+"/smoothed.mha")
- Note that we are using IF2 in order to select an image of pixel type "float".
- The name smoothingFilter is arbitrary and you could have used anything shorter, for example just "f". It all depends on how much you want to self-document your code.
- The file format for the output image has to be selected from the set of file format that supports float pixels. This includes
- MetaImage (extension .mha)
- VTK (extension .vtk)
and does not include
- TIFF
- PNG
- JPEG
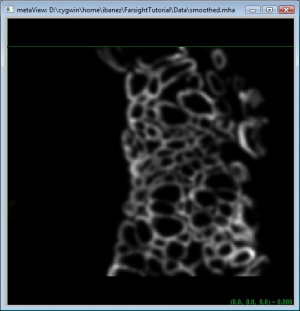
The output image will look like:
Computing gradients from an image
reader1 = itk.ImageFileReader.IF2.New(FileName=pathToImages+"/CellsFluorescence1.png")
image1 = reader1.GetOutput()
gradientFilter = itk.GradientMagnitudeRecursiveGaussianImageFilter.IF2IF2.New()
gradientFilter.SetInput( image1 )
gradientFilter.SetSigma( 2.0 )
gradientFilter.Update()
gradientMagnitudeImage = gradientFilter.GetOutput()
itk.write( gradientMagnitudeImage, pathToImages+"/gradientMagnitude.mha")
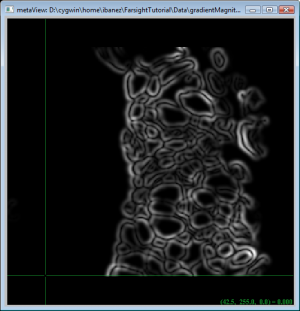
The output image will look like:
Thresholding an image
thresholdFilter = itk.BinaryThresholdImageFilter.IF2IUC2.New()
thresholdFilter.SetUpperThreshold( 200 )
thresholdFilter.SetLowerThreshold(  30 )
thresholdFilter.SetInput( image1 )
thresholdFilter.Update()
binaryImage = thresholdFilter.GetOutput()
itk.write( binaryImage, pathToImages+"/binary.png")
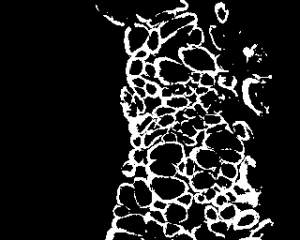
In this case the type of the input image and the output image are not the same. The input image uses "float" as pixel type IF2, while the output image uses "unsigned char" (8 bits per pixel) IUC2.
The output image will look like:
Simplifying Notation
Note that the previous example could have been written as
thresholdFilter = itk.BinaryThresholdImageFilter.IF2IUC2.New()
thresholdFilter.SetUpperThreshold( 200 )
thresholdFilter.SetLowerThreshold(  30 )
thresholdFilter.SetInput( reader1.GetOutput() )
itk.write(  thresholdFilter, pathToImages+"/binary.png")
which has the advantage of
- Not having to create variables for intermediate images
- Not having to call Update() in intermediate filter


