FARSIGHT Tutorials/Building Software/Building ITK
LuisIbanez (Talk | contribs) (→Run CMakeGui) |
LuisIbanez (Talk | contribs) (→Windows) |
||
| (46 intermediate revisions by one user not shown) | |||
| Line 98: | Line 98: | ||
* Write "Release" in the option '''CMAKE_BUILD_TYPE''' | * Write "Release" in the option '''CMAKE_BUILD_TYPE''' | ||
* In the variable CMAKE_INSTALL_PREFIX write the '''INSTALLATION''' directory | * In the variable CMAKE_INSTALL_PREFIX write the '''INSTALLATION''' directory | ||
| + | |||
| + | |||
| + | [[Image:ITK-CMake-Linux-03.png|300px|center|Insight CMake configuration]] | ||
| + | |||
| + | |||
* Hit the "c" key again in order to configure with these changes | * Hit the "c" key again in order to configure with these changes | ||
| Line 103: | Line 108: | ||
| − | [[Image:ITK-CMake-Linux- | + | |
| + | [[Image:ITK-CMake-Linux-04.png|300px|center|Insight CMake configuration]] | ||
| Line 112: | Line 118: | ||
* Turn '''ON''' the option '''USE_WRAP_ITK''' | * Turn '''ON''' the option '''USE_WRAP_ITK''' | ||
| − | |||
| − | + | [[Image:ITK-CMake-Linux-05.png|300px|center|Insight CMake configuration]] | |
| − | + | * Hit the "c" key again to configure with these changes. | |
| + | * CMake will indicates that it needs to know the location of CableSwig. If you see the warning message, type "e" to exit from the warning message window. | ||
| + | |||
| + | [[Image:ITK-CMake-Linux-06.png|300px|center|Insight CMake configuration]] | ||
| + | |||
| + | |||
| + | * In the '''CableSwig_DIR" variable type the directory where you build or installed CableSwig | ||
| + | |||
| + | |||
| + | [[Image:ITK-CMake-Linux-07.png|300px|center|Insight CMake configuration]] | ||
| + | |||
| + | |||
| + | * You may see warning messages similar the image below, simply hit the "e" key to exit from the warning message. | ||
| + | |||
| + | |||
| + | [[Image:ITK-CMake-Linux-09.png|300px|center|Insight CMake configuration]] | ||
| + | |||
| + | |||
| + | * Hit "c" to continue with the configuration | ||
| + | |||
| + | |||
| + | [[Image:ITK-CMake-Linux-08.png|300px|center|Insight CMake configuration]] | ||
| + | |||
| + | [[Image:ITK-CMake-Linux-10.png|300px|center|Insight CMake configuration]] | ||
| + | |||
| + | |||
| + | * Hit the "g" key to generate | ||
| + | |||
| + | At this point ccmake will exit. | ||
| + | |||
| + | === Windows with Visual Studio === | ||
==== Run CMakeGui ==== | ==== Run CMakeGui ==== | ||
| + | |||
| + | Launch '''CMake''' (cmake-gui). | ||
| + | Note that this is the new GUI version, based on Qt, that is distributed with CMake 2.6. | ||
Once the GUI application appears you should specify the | Once the GUI application appears you should specify the | ||
| Line 127: | Line 165: | ||
The CMake window will look similar to: | The CMake window will look similar to: | ||
| + | [[Image:ITK-CMake-Windows-01.png|748px|center|Initial CMake GUI for building ITK]] | ||
| − | + | Hit the '''Configure''' button. | |
| + | If the binary directory doesn't exist yet, CMake will offer to create the directory for you. | ||
| + | |||
| + | ==== Select Windows Compiler ==== | ||
| + | |||
| + | |||
| + | If you have multiple versions of Visual Studio installed, CMake will offer you the option of selecting one of the installed versions. | ||
| − | |||
The the CMake gui will look like: | The the CMake gui will look like: | ||
| − | |||
| − | + | [[Image:ITK-CMake-Windows-02.PNG|508px|center|Initial CMake GUI for building ITK]] | |
| + | |||
| + | |||
| + | You '''MUST''' use the '''EXACT SAME''' compiler that you used for building CableSwig. (See: [[FARSIGHT Tutorials/Building Software/Building CableSwig|Building CableSwig]]) | ||
| + | |||
| + | Once you select the compiler, CMake will analyze the characteristics of your system, including your compiler. The advance of the process will be displayed in the progress bar on the bottom right corner of the CMake interface. | ||
| + | |||
| + | |||
| + | [[Image:ITK-CMake-Windows-03.PNG|508px|center|Initial CMake GUI for building ITK]] | ||
| + | |||
| + | ==== Select Basic Options ==== | ||
| + | |||
| + | When CMake completes analyzing your system, you will see a window similar to: | ||
| + | |||
| + | |||
| + | [[Image:ITK-CMake-Windows-04.PNG|508px|center|Initial CMake GUI for building ITK]] | ||
| + | |||
| + | |||
| + | At this point, you should do the following: | ||
* Turn '''OFF''' the option '''BUILD_EXAMPLES''' | * Turn '''OFF''' the option '''BUILD_EXAMPLES''' | ||
* Turn '''OFF''' the option '''BUILD_TESTING''' | * Turn '''OFF''' the option '''BUILD_TESTING''' | ||
| − | * Turn '''ON''' the option ''' | + | * Turn '''ON''' the option '''BUILD_SHARED_LIBS''' |
| − | * | + | * In the variable '''CMAKE_INSTALL_PREFIX''' write the '''INSTALLATION''' directory (ideally the same directory where you installed CableSwig, See: [[FARSIGHT Tutorials/Building Software/Building CableSwig|Building CableSwig]])) |
| − | + | ||
| − | + | ||
| + | At this point the CMake window will look like: | ||
| + | |||
| + | |||
| + | [[Image:ITK-CMake-Windows-05.PNG|508px|center|Initial CMake GUI for building ITK]] | ||
| + | |||
| + | |||
| + | Hit the '''Configure''' button again in order to configure with these changes. | ||
CMake will then show you a screen similar to: | CMake will then show you a screen similar to: | ||
| − | + | ||
| + | [[Image:ITK-CMake-Windows-06.PNG|508px|center|Initial CMake GUI for building ITK]] | ||
| + | |||
| + | ==== Select Advanced Options ==== | ||
| + | |||
| + | Now pass to the advance variables by selecting the drop-down menu at the right of the "Search" field. | ||
| + | |||
| + | |||
| + | [[Image:ITK-CMake-Windows-07.PNG|508px|center|Initial CMake GUI for building ITK]] | ||
| + | |||
| + | |||
| + | The default option is '''"Simple View"''', select now '''"Advanced View"'''. | ||
| + | You will see then a window similar to: | ||
| + | |||
| + | |||
| + | [[Image:ITK-CMake-Windows-08.PNG|508px|center|Initial CMake GUI for building ITK]] | ||
| + | |||
| + | |||
* In the "search" field type "REVIEW" in order to jump to the option that can turn ON the use of new packages in ITK | * In the "search" field type "REVIEW" in order to jump to the option that can turn ON the use of new packages in ITK | ||
* Turn '''ON''' the option '''ITK_USE_REVIEW''' | * Turn '''ON''' the option '''ITK_USE_REVIEW''' | ||
| − | * In the "search" field type " | + | |
| + | |||
| + | [[Image:ITK-CMake-Windows-09.PNG|508px|center|Initial CMake GUI for building ITK]] | ||
| + | |||
| + | |||
| + | * In the "search" field type "WRAP" in order to jump to the option that can turn wrapping ON | ||
* Turn '''ON''' the option '''USE_WRAP_ITK''' | * Turn '''ON''' the option '''USE_WRAP_ITK''' | ||
| + | |||
| + | |||
| + | [[Image:ITK-CMake-Windows-10.PNG|508px|center|Initial CMake GUI for building ITK]] | ||
| + | |||
| + | |||
* Hit the '''Configure''' button again in order to bring up the options related to Wrapping. | * Hit the '''Configure''' button again in order to bring up the options related to Wrapping. | ||
| + | * The progress of the configuration will be displayed on the bottom right bar | ||
| + | |||
| + | |||
| + | [[Image:ITK-CMake-Windows-11.PNG|508px|center|Initial CMake GUI for building ITK]] | ||
| + | |||
| + | |||
| + | |||
* In the "search" field type "WRAP_ITK_PYTHON" in order to jump to the option that can turn wrapping ON | * In the "search" field type "WRAP_ITK_PYTHON" in order to jump to the option that can turn wrapping ON | ||
| − | * Turn '''ON''' the option '''WRAP_ITK_PYTON''' | + | * Turn '''ON''' the option '''WRAP_ITK_PYTON''' (if it is not ON already). |
| + | |||
| + | |||
| + | [[Image:ITK-CMake-Windows-12.PNG|508px|center|Initial CMake GUI for building ITK]] | ||
| + | |||
| + | |||
| + | * Hit the '''Configure''' button again in order to bring up the options related to Wrapping. | ||
| + | * In the "search" field type "PYTHON" in order to list to the options related to Python. | ||
| + | |||
| + | |||
| + | [[Image:ITK-CMake-Windows-13.PNG|508px|center|Initial CMake GUI for building ITK]] | ||
| + | |||
At this point the following CMake variables should be populated | At this point the following CMake variables should be populated | ||
| − | * PYTHON_EXECUTABLE | + | * '''PYTHON_EXECUTABLE''' |
| − | * PYTHON_INCLUDE_PATH | + | * '''PYTHON_INCLUDE_PATH''' |
| − | * PYTHON_LIBRARY | + | * '''PYTHON_LIBRARY''' |
| − | You do | + | You do '''NOT''' need the '''PYTHON_DEBUG_LIBRARY''', since you should build the wrapping for '''Release''' mode. |
You may see values such as | You may see values such as | ||
| Line 177: | Line 290: | ||
| PYTHON_LIBRARY || C:/Program Files/Python2.5/libs/python25.lib | | PYTHON_LIBRARY || C:/Program Files/Python2.5/libs/python25.lib | ||
|} | |} | ||
| + | |||
| + | |||
| + | Of course, your variables may be different, depending on whether you installed Python and what version of Python you are using. If any of these variables is not set, or if they are not consistent, you should double click on them and replace the offending value with the correct one. | ||
| + | |||
| + | * Hit the "Configure" key | ||
| + | |||
| + | CMake window will look like: | ||
| + | |||
| + | [[Image:ITK-CMake-Windows-14.PNG|508px|center|Initial CMake GUI for building ITK]] | ||
| + | |||
| + | |||
| + | and if no new red variables appear, you can then hit the "Generate" button. | ||
| + | |||
| + | CMake processing window will appear as: | ||
| + | |||
| + | |||
| + | [[Image:ITK-CMake-Windows-15.PNG|508px|center|Initial CMake GUI for building ITK]] | ||
| + | |||
| + | |||
| + | Once the generation process is completed, the CMake interface will look like: | ||
| + | |||
| + | |||
| + | [[Image:ITK-CMake-Windows-16.PNG|508px|center|Initial CMake GUI for building ITK]] | ||
| + | |||
| + | |||
| + | and at this point you can quite by going to the '''File''' menu and selecting '''Exit'''. | ||
= Build = | = Build = | ||
== GNU/Linux == | == GNU/Linux == | ||
| + | |||
| + | Once you quit CMake, after the configuration process has completed, you can start the build process by simply typing | ||
| + | |||
| + | make | ||
| + | |||
| + | |||
| + | You will see output similar to | ||
| + | |||
| + | |||
| + | [[Image:ITK-CMake-Linux-11.png|300px|center]] | ||
| + | |||
| + | |||
| + | This will build ITK and the Python wrappers generated by CableSwig and WrapITK. | ||
| + | |||
| + | This process may take several hours depending on the capabilities of you computer. | ||
| + | |||
| + | Once the build process finishes, you can install the software in the final destination by typing | ||
| + | |||
| + | |||
| + | make install | ||
== Mac == | == Mac == | ||
| Line 188: | Line 347: | ||
=== Finding the Solution File === | === Finding the Solution File === | ||
| − | A solution file should have been created by CMake in your BINARY directory. | + | A solution file should have been created by CMake in your '''BINARY''' directory. |
Depending on your version of Visual Studio, look for | Depending on your version of Visual Studio, look for | ||
| Line 195: | Line 354: | ||
* ITK.sln | * ITK.sln | ||
| − | Open the solution file in your Visual Studio IDE. Make sure that is the | + | Open the solution file in your Visual Studio IDE. |
| + | |||
| + | Make sure that is the '''EXACT SAME VERSION''' of Visual Studio that you selected during the CMake configuration. | ||
| + | The interface will look like: | ||
| + | |||
| + | |||
| + | [[Image:ITK-VisualStudio-Windows-01.png|center]] | ||
| + | |||
| + | |||
=== Selecting Compilation Mode === | === Selecting Compilation Mode === | ||
| Line 201: | Line 368: | ||
Toward the top of the IDE you will find a drop-down menu that let you choose between multiple compilation modes (for example: Debug, Release, RelDebInfo...). | Toward the top of the IDE you will find a drop-down menu that let you choose between multiple compilation modes (for example: Debug, Release, RelDebInfo...). | ||
| − | Select '''Release''' in this menu. | + | * Select '''Release''' in this menu. |
| + | as shown in the image below: | ||
| + | |||
| + | |||
| + | [[Image:ITK-VisualStudio-Windows-02.PNG|center]] | ||
| + | |||
=== Building the Solution === | === Building the Solution === | ||
Then start the build by hitting the F7 or by going to the '''Build''' menu and selecting '''Build Solution''' | Then start the build by hitting the F7 or by going to the '''Build''' menu and selecting '''Build Solution''' | ||
| + | |||
| + | |||
| + | The Visual Studio IDE will look similar to: | ||
| + | |||
| + | |||
| + | [[Image:ITK-VisualStudio-Windows-03.PNG|center]] | ||
| + | |||
The build process may take a couple of hours depending on the capabilities of your computer. | The build process may take a couple of hours depending on the capabilities of your computer. | ||
| − | This is an excellent time for reading the rest of the Tutorial, for example the [[FARSIGHT Tutorials/Quick Start | Quick Start (30 minutes)]] | + | This is an excellent time for reading the rest of the Tutorial, |
| + | |||
| + | for example the [[FARSIGHT Tutorials/Quick Start | Quick Start (30 minutes)]] | ||
| + | |||
| + | Once the compilation finishes | ||
| + | |||
| + | * You should select the "INSTALL" target | ||
| + | * Right click on it and select "Build" | ||
| + | |||
| + | This will install the libraries in the '''INSTALLATION''' directory, as shown below | ||
| + | |||
| + | |||
| + | [[Image:ITK-VisualStudio-Windows-04.PNG|center]] | ||
| + | |||
| + | |||
| + | |||
| + | Optionally you can now also package the libraries so that they can be installed in another computer without having to build them there. | ||
| + | |||
| + | To do this | ||
| + | |||
| + | * Select the "PACKAGE" target | ||
| + | * Right click on it and select "Build" | ||
| + | |||
| + | |||
| + | [[Image:ITK-VisualStudio-Windows-05.PNG|center]] | ||
| + | |||
| + | |||
| + | Once the package files are generated the IDE will look like | ||
| + | |||
| + | [[Image:ITK-VisualStudio-Windows-06.PNG|center]] | ||
| + | |||
| + | |||
| + | As an example, | ||
| + | the result of the generated INSTALLER is available at: | ||
| + | |||
| + | |||
| + | [http://public.kitware.com/pub/itk/InsightApplicationsBin/InsightToolkitWithPythonWrapping-3.13.0-win32.exe ITK With Python Wrapping Installer] | ||
= Setting up the Environment = | = Setting up the Environment = | ||
| Line 238: | Line 453: | ||
* In the new window that opens, select the "Advanced" tab | * In the new window that opens, select the "Advanced" tab | ||
* In the Advanced tab, click on the "Environment Variables" | * In the Advanced tab, click on the "Environment Variables" | ||
| − | * Select the '''PATH''' variable and add to it the '''INSTALLATION''' directory (where you installed ITK). You will use a ";" to separate this directory from others that may already exist in the list. | + | * Select the '''PATH''' variable and add to it the '''INSTALLATION'''/bin directory (where you installed ITK). You will use a ";" to separate this directory from others that may already exist in the list. |
| + | ** For example | ||
| + | *** I installed ITK in the directory D:\ProgramFiles\InsightToolkit-3.13 | ||
| + | *** Then I added to the '''PATH''' variable the directory D:\ProgramFiles\InsightToolkit-3.13\bin | ||
| + | *** (note the /bin at the end) | ||
| + | * Select the '''PYTHONPATH''' variable (or create it if it doesn't exist) and add to it the directory | ||
| + | ** '''INSTALLATION'''\lib\InsightToolkit\WrapITK\Python | ||
| + | *** For example, in my installation, the '''PYTHONPATH''' variable contains: | ||
| + | **** D:\ProgramFiles\InsightToolkit-3.13\lib\InsightToolkit\WrapITK\Python | ||
= Testing = | = Testing = | ||
Latest revision as of 13:06, 4 May 2009
Contents |
Overview
This tutorial describes how to build ITK with the options required for using it along with FARSIGHT. In particular it includes instructions on how to build the Python wrapping using WrapITK.
Requirements
Before you proceed with this step you should have
- Installed CMake (Click Here for details)
- Installed Python (Click Here for details)
- Build Cable Swig (Click Here for details)
- Available Disk Space of (at least) 1 Gb)
Download ITK
The source code of ITK can be downloaded from
New releases of ITK are posted every three months.
Please use the most recent release of the software.
Configure
Define SOURCE, BINARY and INSTALLATION directories
CMake uses the concept of SOURCE, BINARY and INSTALLATION directories
- The SOURCE directory, in this case, is the directory where you put the source code of ITK
- The BINARY directory, in this case, is the directory where you want to compile and build ITK
- The INSTALLATION directory, in this case, is the directory where you want to install
This is known as "out of source" building and it is strongly recommended as a good practice, as opposed to the "in-source" building where you could mix the binary and source directories into a single one, and generate great confusion and future suffering.
The build process involves reading the source code from the SOURCE directory and compiling it into libraries that are deposited in the BINARY directory, and finally installing the minimal set of components required for run-time into and INSTALLATION directory.
GNU/Linux & Mac
Create Directories
For the sake this tutorial, lets assume that you are using
- SOURCE directory = $HOME/src/Insight
- BINARY directory = $HOME/bin/InsightWithPython
That means that you expanded the source code of ITK in the directory "$HOME/src/Insight" and that you manually created the directory "$HOME/bin/InsightWithPython" with a command such as
  cd
  mkdir InsightWithPython
Select Compiler
Select your compiler by setting the environment varialbles CC and CXX
For example, if you are using zsh:
  export CC=/usr/bin/gcc-4.1
  export CXX=/usr/bin/g++-4.1
or if you are using bash:
  setenv CC  /usr/bin/gcc-4.1
  setenv CXX /usr/bin/g++-4.1
Please note that you should use the SAME compiler in order to build all the libraries and projects.
You want to use the explicit name of the compiler along with its version (gcc-4.1) as opposed to the generic name of the compiler (gcc). In this way, if you later update your compiler in this computer, your build of ITK will still use the proper compiler consistently.
Run ccmake
Then you should move into the BINARY directory run "ccmake" in order to configure ITK. When you run "ccmake" you provide the SOURCE directory as an argument.
  cd  InsightWithPython
  ccmake   $HOME/src/Insight
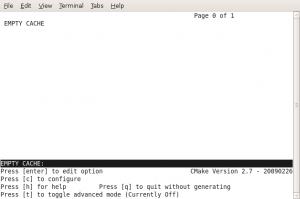
This will show an image similar to:
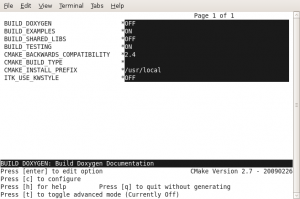
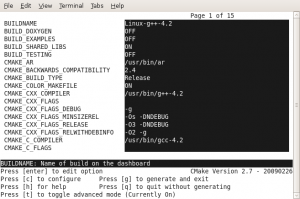
hit the "c" key in order to "configure". At this point CMake will test the capabilities of your compiler, after a couple of minutes it will show you an image similar to:
Proceed to do the following:
- Turn OFF the option BUILD_EXAMPLES
- Turn OFF the option BUILD_TESTING
- Turn ON the option BUILD_SHARED
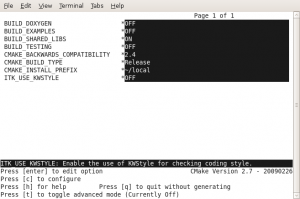
- Write "Release" in the option CMAKE_BUILD_TYPE
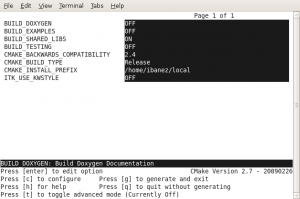
- In the variable CMAKE_INSTALL_PREFIX write the INSTALLATION directory
- Hit the "c" key again in order to configure with these changes
CMake will then show you a screen similar to:
- Now pass to the advance variables by hitting the "t" key (for "toggle to advanced") and
- Hit the "/" key (for "search") and type "REVIEW" in order to jump to the option that can turn ON the use of new packages in ITK
- Turn ON the option ITK_USE_REVIEW
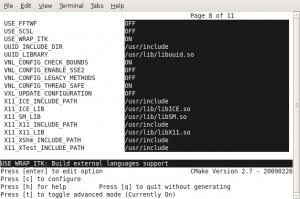
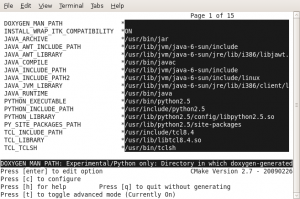
- Hit the "/" key (for "search") and type "WRAP_ITK" in order to jump to the option that can turn wrapping ON
- Turn ON the option USE_WRAP_ITK
- Hit the "c" key again to configure with these changes.
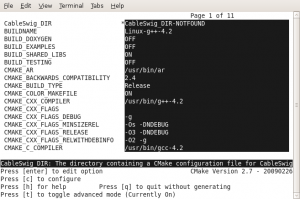
- CMake will indicates that it needs to know the location of CableSwig. If you see the warning message, type "e" to exit from the warning message window.
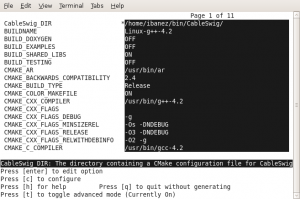
- In the CableSwig_DIR" variable type the directory where you build or installed CableSwig
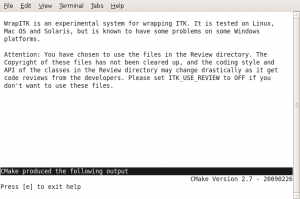
- You may see warning messages similar the image below, simply hit the "e" key to exit from the warning message.
- Hit "c" to continue with the configuration
- Hit the "g" key to generate
At this point ccmake will exit.
Windows with Visual Studio
Run CMakeGui
Launch CMake (cmake-gui). Note that this is the new GUI version, based on Qt, that is distributed with CMake 2.6.
Once the GUI application appears you should specify the
- SOURCE directory at the top of the GUI in the "Where is the source code" field
- BINARY directory in the field below, marked as "Where to build the binaries".
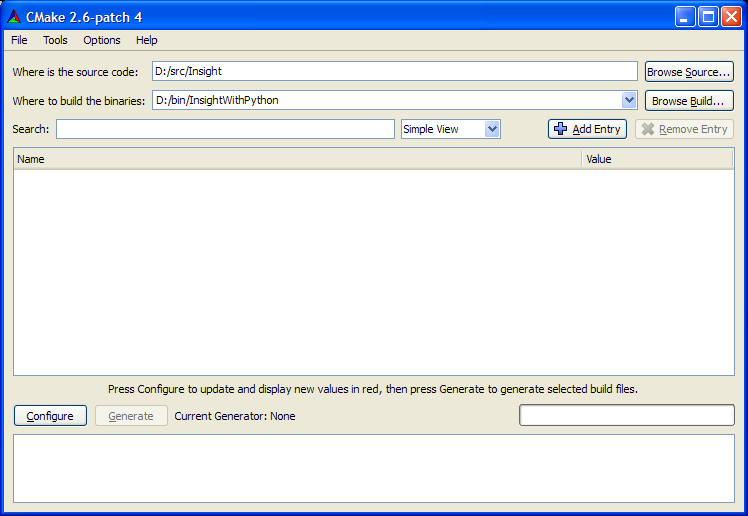
The CMake window will look similar to:
Hit the Configure button.
If the binary directory doesn't exist yet, CMake will offer to create the directory for you.
Select Windows Compiler
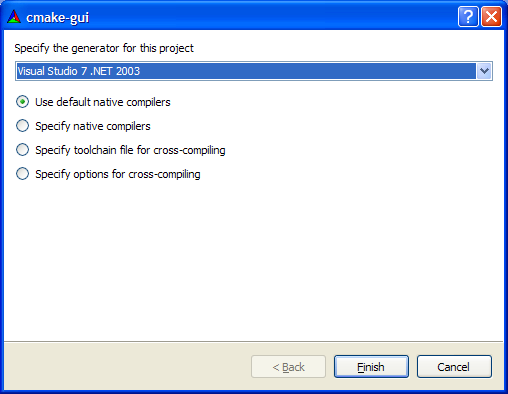
If you have multiple versions of Visual Studio installed, CMake will offer you the option of selecting one of the installed versions.
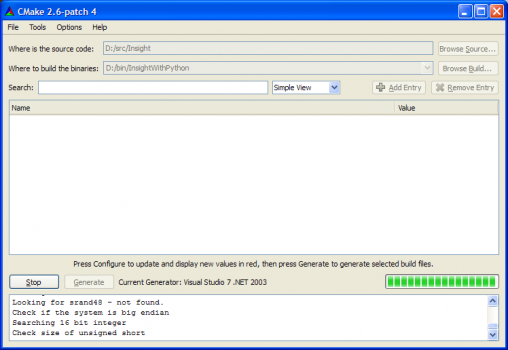
The the CMake gui will look like:
You MUST use the EXACT SAME compiler that you used for building CableSwig. (See: Building CableSwig)
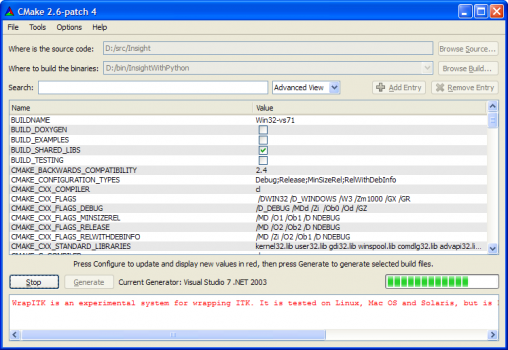
Once you select the compiler, CMake will analyze the characteristics of your system, including your compiler. The advance of the process will be displayed in the progress bar on the bottom right corner of the CMake interface.
Select Basic Options
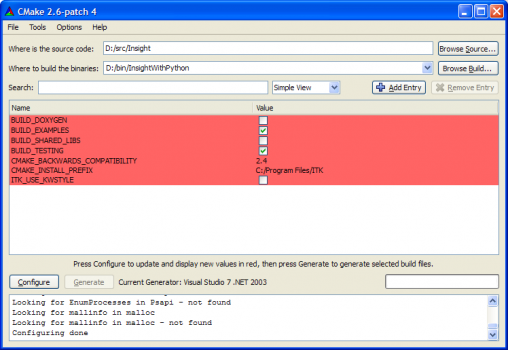
When CMake completes analyzing your system, you will see a window similar to:
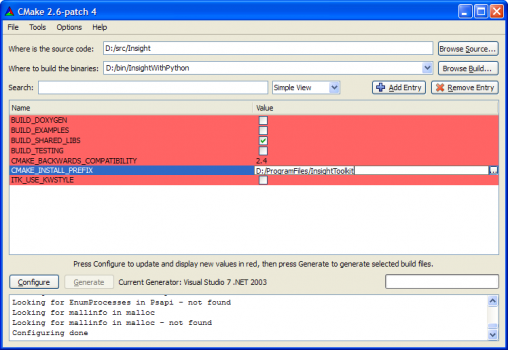
At this point, you should do the following:
- Turn OFF the option BUILD_EXAMPLES
- Turn OFF the option BUILD_TESTING
- Turn ON the option BUILD_SHARED_LIBS
- In the variable CMAKE_INSTALL_PREFIX write the INSTALLATION directory (ideally the same directory where you installed CableSwig, See: Building CableSwig))
At this point the CMake window will look like:
Hit the Configure button again in order to configure with these changes.
CMake will then show you a screen similar to:
Select Advanced Options
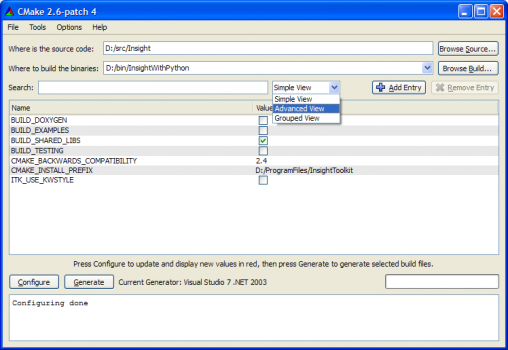
Now pass to the advance variables by selecting the drop-down menu at the right of the "Search" field.
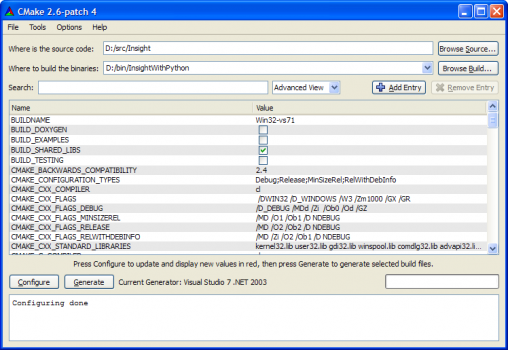
The default option is "Simple View", select now "Advanced View".
You will see then a window similar to:
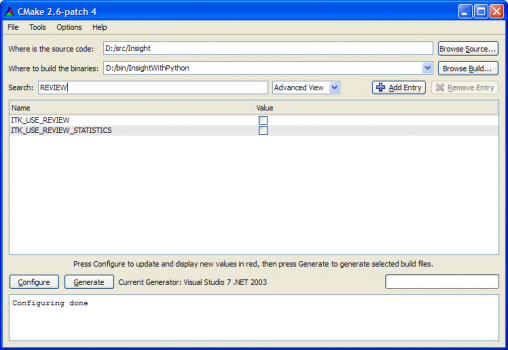
- In the "search" field type "REVIEW" in order to jump to the option that can turn ON the use of new packages in ITK
- Turn ON the option ITK_USE_REVIEW
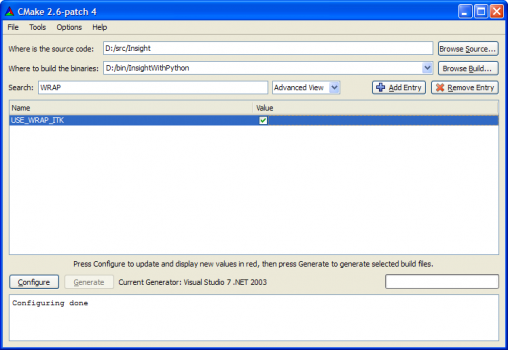
- In the "search" field type "WRAP" in order to jump to the option that can turn wrapping ON
- Turn ON the option USE_WRAP_ITK
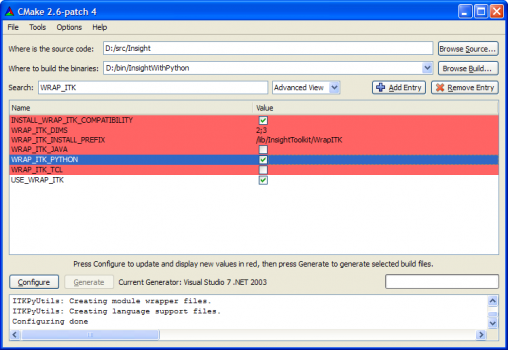
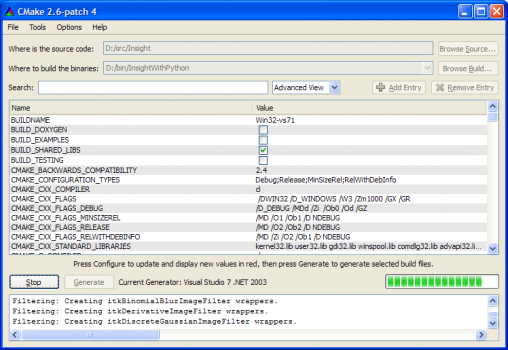
- Hit the Configure button again in order to bring up the options related to Wrapping.
- The progress of the configuration will be displayed on the bottom right bar
- In the "search" field type "WRAP_ITK_PYTHON" in order to jump to the option that can turn wrapping ON
- Turn ON the option WRAP_ITK_PYTON (if it is not ON already).
- Hit the Configure button again in order to bring up the options related to Wrapping.
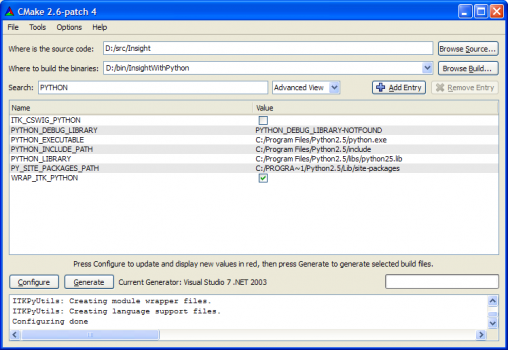
- In the "search" field type "PYTHON" in order to list to the options related to Python.
At this point the following CMake variables should be populated
- PYTHON_EXECUTABLE
- PYTHON_INCLUDE_PATH
- PYTHON_LIBRARY
You do NOT need the PYTHON_DEBUG_LIBRARY, since you should build the wrapping for Release mode.
You may see values such as
| CMake Variable | Example value |
|---|---|
| PYTHON_EXECUTABLE | C:/Program Files/Python2.5/python.exe |
| PYTHON_INCLUDE_PATH | C:/Program Files/Python2.5/include |
| PYTHON_LIBRARY | C:/Program Files/Python2.5/libs/python25.lib |
Of course, your variables may be different, depending on whether you installed Python and what version of Python you are using. If any of these variables is not set, or if they are not consistent, you should double click on them and replace the offending value with the correct one.
- Hit the "Configure" key
CMake window will look like:
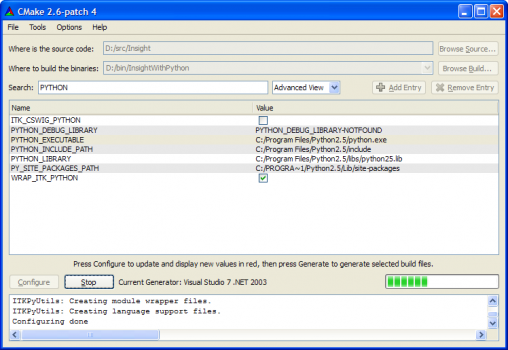
and if no new red variables appear, you can then hit the "Generate" button.
CMake processing window will appear as:
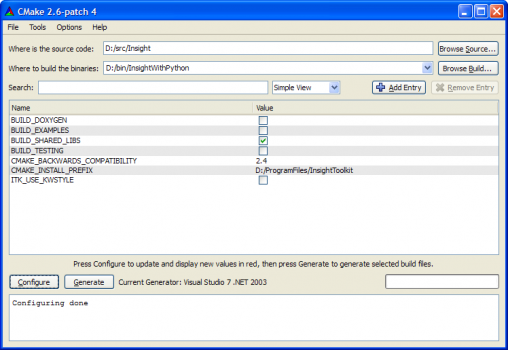
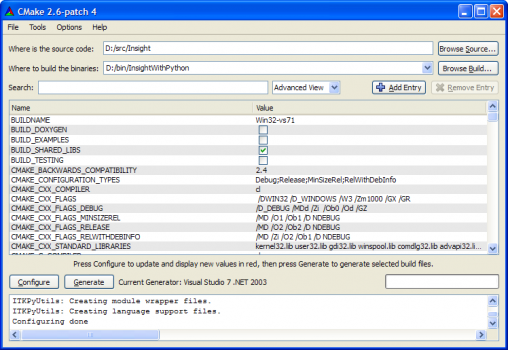
Once the generation process is completed, the CMake interface will look like:
and at this point you can quite by going to the File menu and selecting Exit.
Build
GNU/Linux
Once you quit CMake, after the configuration process has completed, you can start the build process by simply typing
make
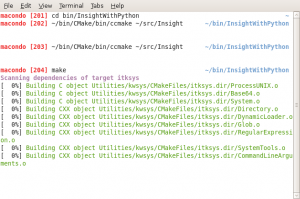
You will see output similar to
This will build ITK and the Python wrappers generated by CableSwig and WrapITK.
This process may take several hours depending on the capabilities of you computer.
Once the build process finishes, you can install the software in the final destination by typing
make install
Mac
Windows
Finding the Solution File
A solution file should have been created by CMake in your BINARY directory.
Depending on your version of Visual Studio, look for
- ITK.dsw or
- ITK.sln
Open the solution file in your Visual Studio IDE.
Make sure that is the EXACT SAME VERSION of Visual Studio that you selected during the CMake configuration. The interface will look like:
Selecting Compilation Mode
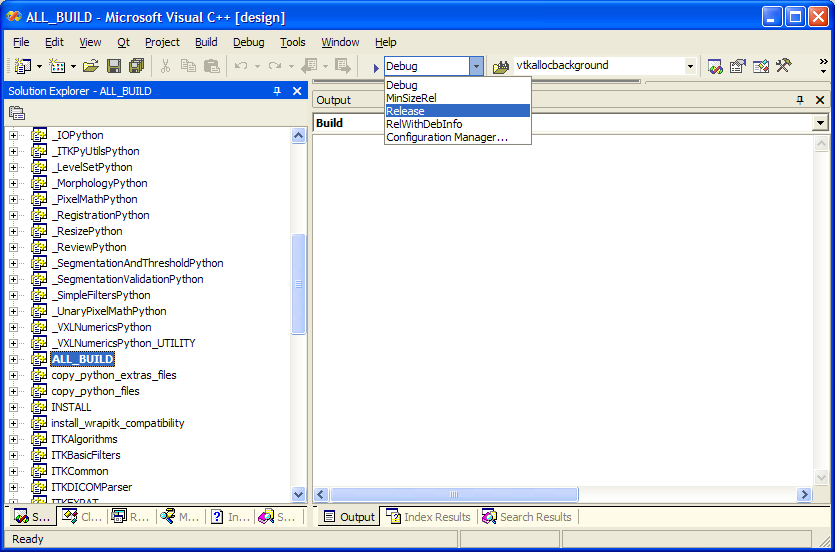
Toward the top of the IDE you will find a drop-down menu that let you choose between multiple compilation modes (for example: Debug, Release, RelDebInfo...).
- Select Release in this menu.
as shown in the image below:
Building the Solution
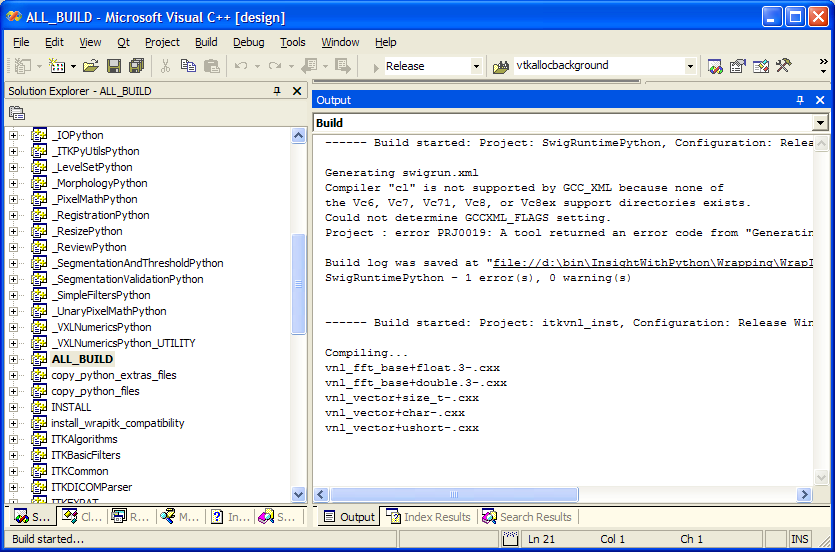
Then start the build by hitting the F7 or by going to the Build menu and selecting Build Solution
The Visual Studio IDE will look similar to:
The build process may take a couple of hours depending on the capabilities of your computer.
This is an excellent time for reading the rest of the Tutorial,
for example the Quick Start (30 minutes)
Once the compilation finishes
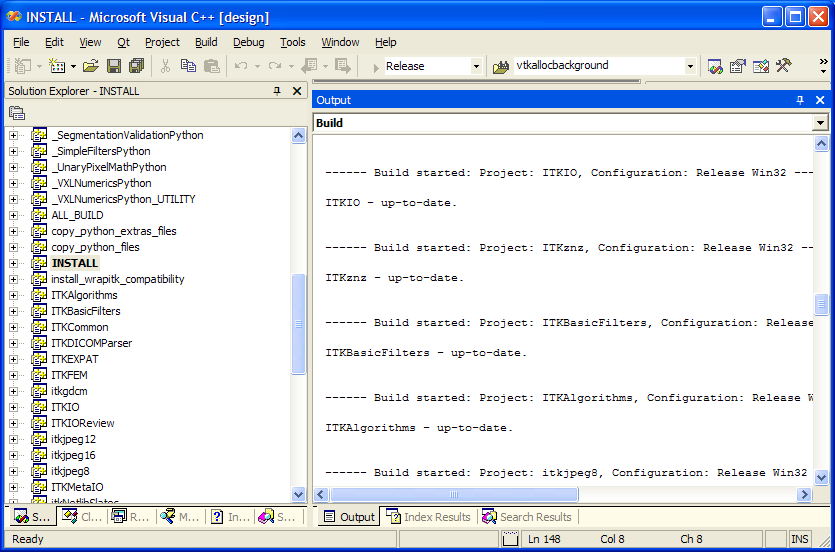
- You should select the "INSTALL" target
- Right click on it and select "Build"
This will install the libraries in the INSTALLATION directory, as shown below
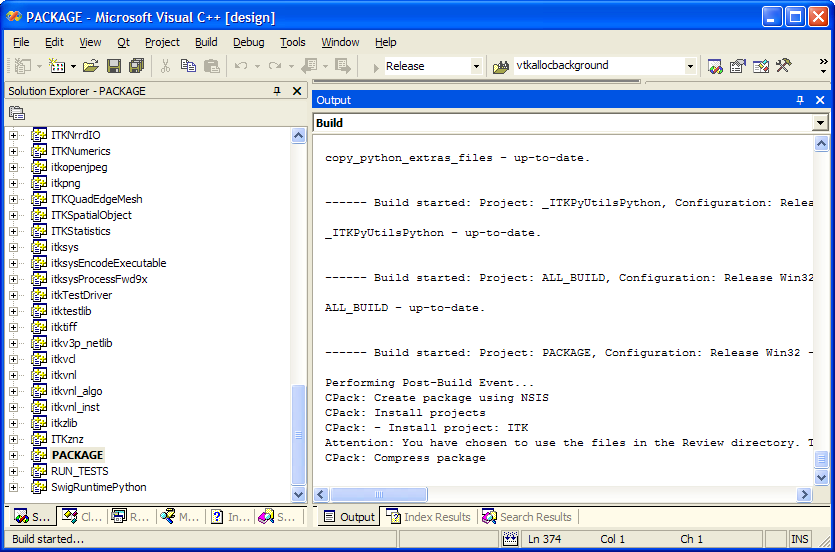
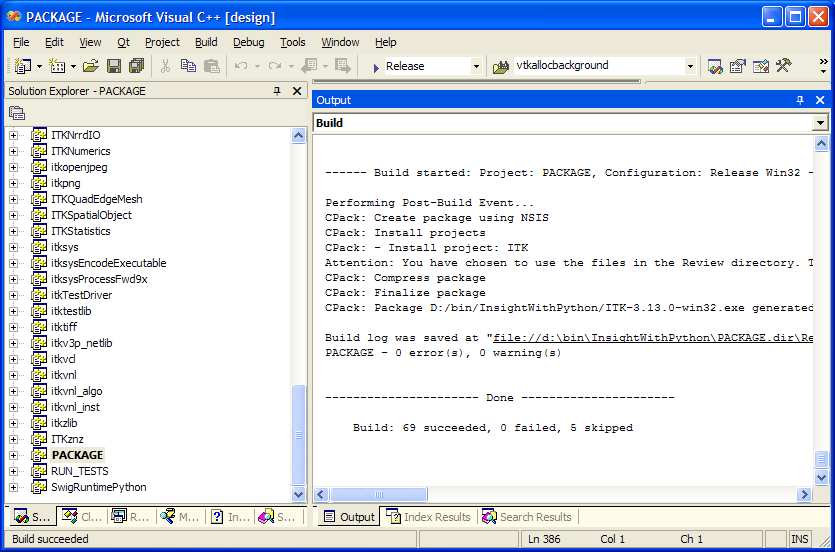
Optionally you can now also package the libraries so that they can be installed in another computer without having to build them there.
To do this
- Select the "PACKAGE" target
- Right click on it and select "Build"
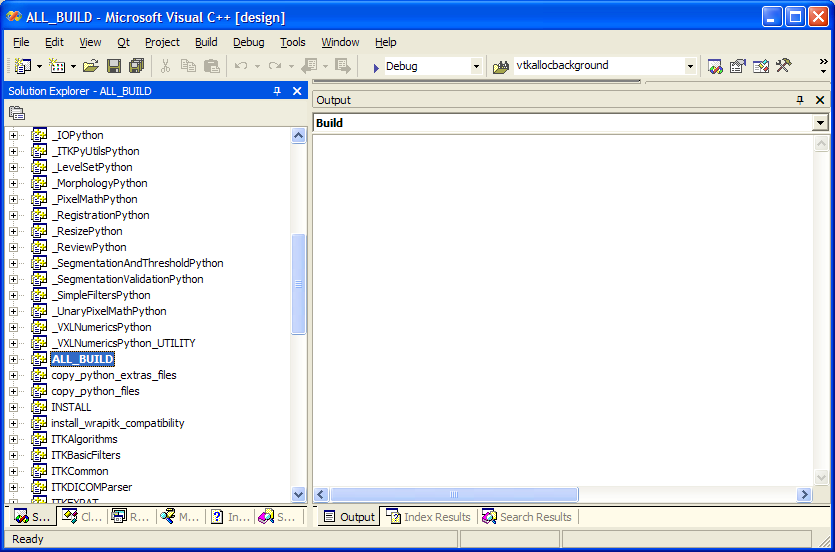
Once the package files are generated the IDE will look like
As an example,
the result of the generated INSTALLER is available at:
ITK With Python Wrapping Installer
Setting up the Environment
GNU/Linux & Mac
Set the following environment variables
Here is an example of the setting for a GNU/Linux build where ITK was installed in the "$HOME/local" directory
 export ITKWRAPPEDINSTALLED=$HOME/local/WrapITK/lib/InsightToolkit
 export LD_LIBRARY_PATH=$ITKWRAPPEDINSTALLED:$ITKWRAPPEDINSTALLED/WrapITK/lib:$HOME/local/WrapITK/lib/vtk-5.4
 export PYTHONPATH=$ITKWRAPPEDINSTALLED/WrapITK/lib/:$ITKWRAPPEDINSTALLED/WrapITK/Python/
Windows
You will define several environment variables. Depending on your version of windows this is done in slightly different ways.
In Windows XP you can do
- In the Start menu, select "My Computer"
- In the new window that opens, right click and select "Properties"
- In the new window that opens, select the "Advanced" tab
- In the Advanced tab, click on the "Environment Variables"
- Select the PATH variable and add to it the INSTALLATION/bin directory (where you installed ITK). You will use a ";" to separate this directory from others that may already exist in the list.
- For example
- I installed ITK in the directory D:\ProgramFiles\InsightToolkit-3.13
- Then I added to the PATH variable the directory D:\ProgramFiles\InsightToolkit-3.13\bin
- (note the /bin at the end)
- For example
- Select the PYTHONPATH variable (or create it if it doesn't exist) and add to it the directory
- INSTALLATION\lib\InsightToolkit\WrapITK\Python
- For example, in my installation, the PYTHONPATH variable contains:
- D:\ProgramFiles\InsightToolkit-3.13\lib\InsightToolkit\WrapITK\Python
- For example, in my installation, the PYTHONPATH variable contains:
- INSTALLATION\lib\InsightToolkit\WrapITK\Python
Testing
In order to verify if your build and installation is working correctly you can do the following
- Start the Python command line interpreter
- In GNU/Linux and Mac this is done by simply typing "python"
- In Windows this is done by launching from the Start menu the program "Python (command line)"
- Once the command line window appears, type
- import itk
- This may take some seconds while the shared libraries are loaded.
- If you don't get any error messages, then your build and configuration have been successful and you can proceed to start enjoying ITK for your image processing needs.
Continue with the Quick Start (30 minutes) tutorial session.
