NucleusEditor
(→Editing Segmentation Results) |
(→Segment Cell Nuclei) |
||
| Line 9: | Line 9: | ||
== Segment Cell Nuclei == | == Segment Cell Nuclei == | ||
| − | In addition to viewing existing results, NucleusEditor | + | In addition to viewing existing results, NucleusEditor can be also used to segment images of of cell nuclei using a [[multi-step nuclear segmentation algorithm| Nuclear_Segmentation]], which consists of a sequence of steps. NucleusEditor is designed in a way that it simplifies these steps for users to produce results in an efficient manner. |
Revision as of 23:59, 20 August 2009
The NucleusEditor program provides users with the following functionalities:
Contents |
Image Viewer
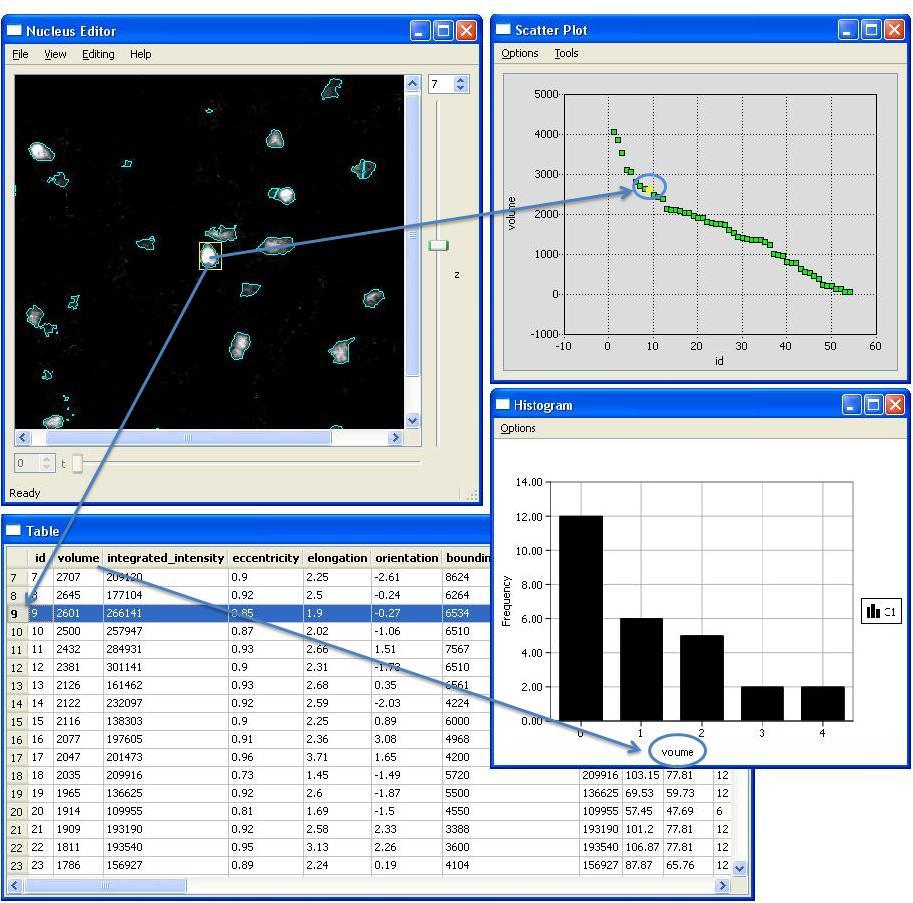
NucleusEditor allows users to view the image data, and the automatically generated multivariate metadata (mainly object features) using multiple data visualization tools that are all actively linked. This linkage is important, and allows the data to be viewed in multiple spaces simultaneously, and a cluster of objects to be selected based on any combination of operations in any of the multiple spaces. We term this method Actively linked multiple spaces architecture (ALISA). NucleusEditor provides this linked-view architecture where objects can be visualized in image or geometric views, table views, plot views, and histogram views. Operations performed in one view are immidiately visible in all of the views.
Segment Cell Nuclei
In addition to viewing existing results, NucleusEditor can be also used to segment images of of cell nuclei using a Nuclear_Segmentation, which consists of a sequence of steps. NucleusEditor is designed in a way that it simplifies these steps for users to produce results in an efficient manner.
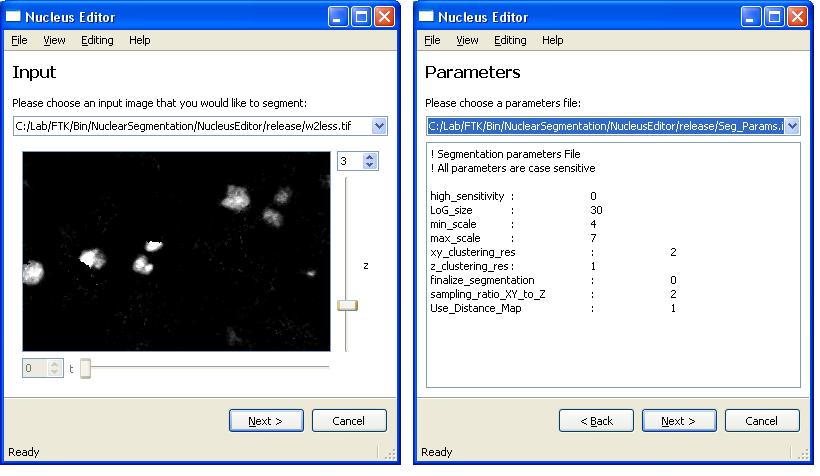
The first step starts with loading an image and a paramater file that affects the quality of the segmentation result.
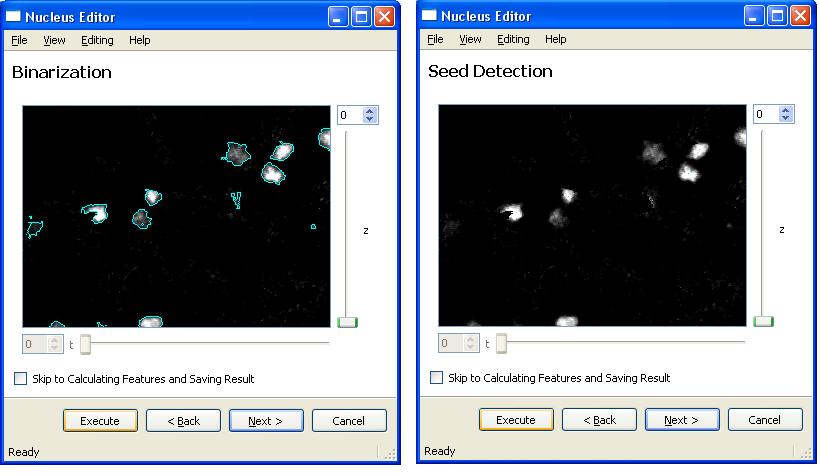
After loading these two files, Clicking on "Execute" and "Next" buttons will take user to the following segmentation steps. Here is the next step,
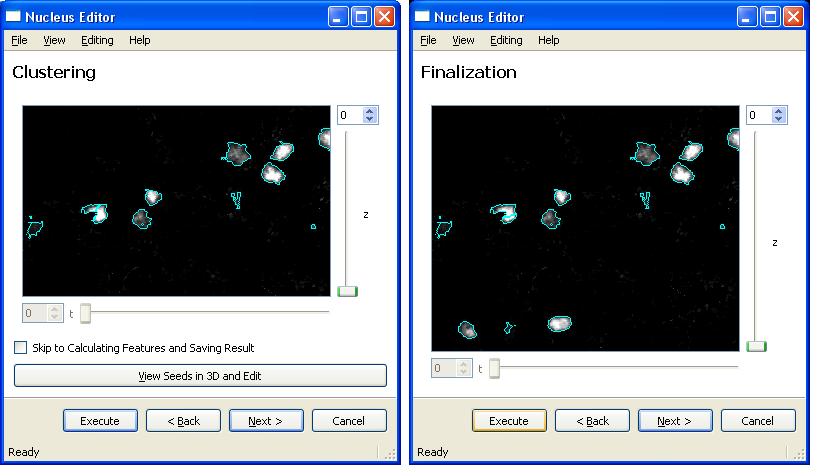
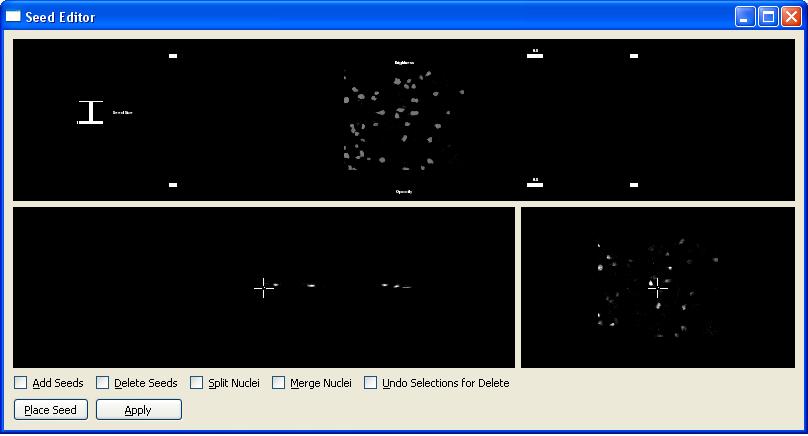
It is also possible to view and edit the seeds for a good segmentation result. In order to do this click on "View Seeds in 3D and Edit" button.
For more information about seed editing and how to use the seed editor visit Seed Editor page.
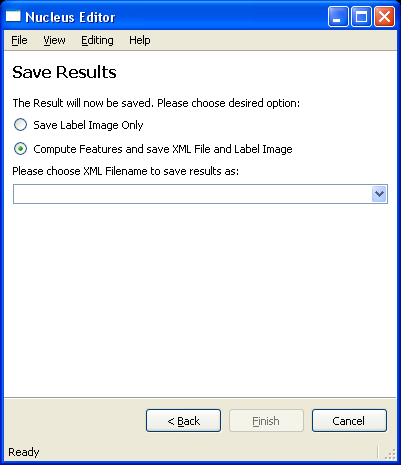
And finally the segmentation of cell nuclei results in an XML document that contains nuclei features.
Editing Segmentation Results
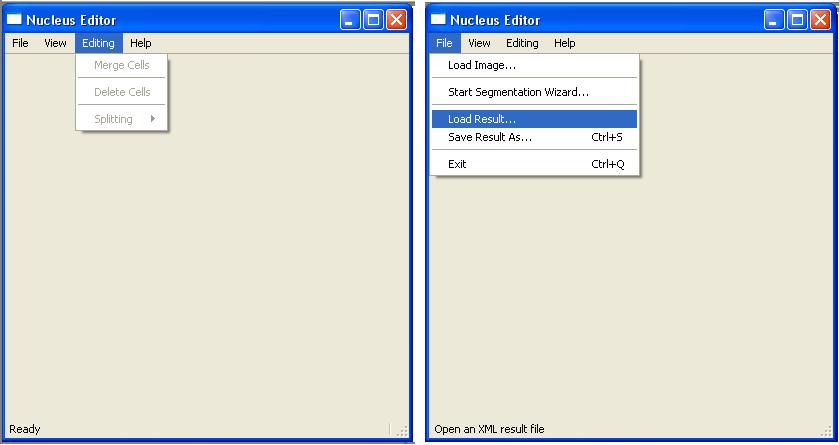
In addition to producing segmentation results, we can also load existing results from an XML file and correct any segmentation results. NucleusEditor provides the following three operations to edit cells:
- Delete Cells
- Merge Cells
- Spliting (Cells)
These editing operations will be active after loading a segmentation result file.
- Delete Cells
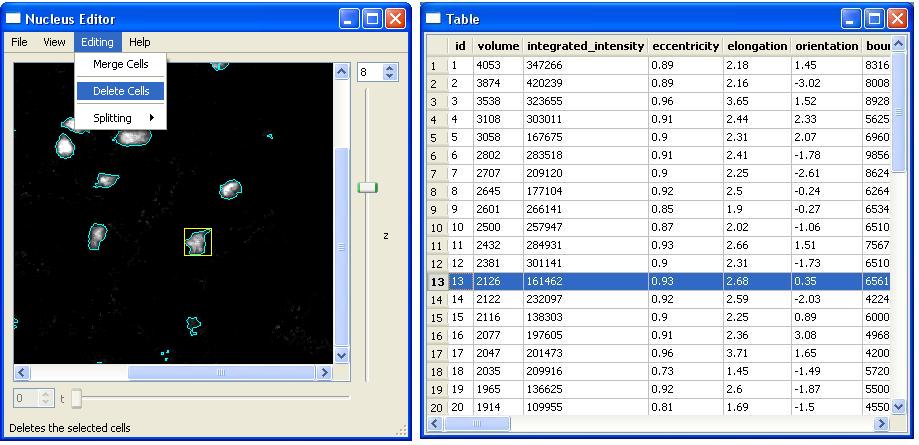
In order to "Delete a cell", we first pick the cell and click on "Delete Cells" menu item. Alternatively, we can press "D" after clicking on the cell. In the following example, we want to delete the cell with id-13. As soon as this cell is deleted all the views will be updated accordingly. In this example, the cell 13 and all the corresponding data presented in that row will be deleted.
- Merge Cells
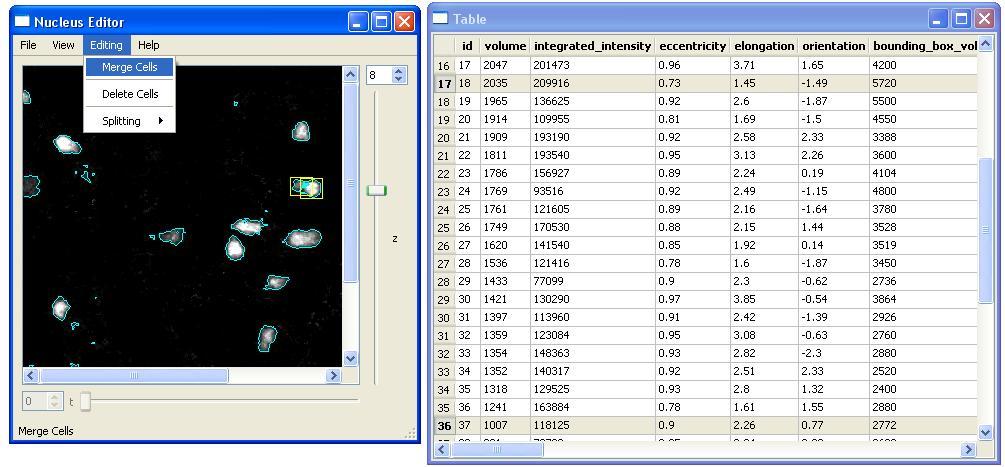
Merging Cells requires the user to select two neighboring cells first. After clicking on the "Merge Cells" menu item, the cells will be merged and the new feature values will be computed and added into the table with a new id. The feature values associated with the old cells will be removed. In the following example, we merge the cells with id 18 and 37. The last id that we have in the table is 54. After the merge operation, the new cell will have id 55 in the table.
Similar to the "Delete Cell" operation, the user can use the keyboard and press "M" to merge the cells. Note that if the selected cells are not neighbors, they will not be merged.
- Splitting (Cells)
Cells can be splitted after we are in the splitting mode. The splitting menu has a submenu that has two items:
- Start Splitting
- End Splitting
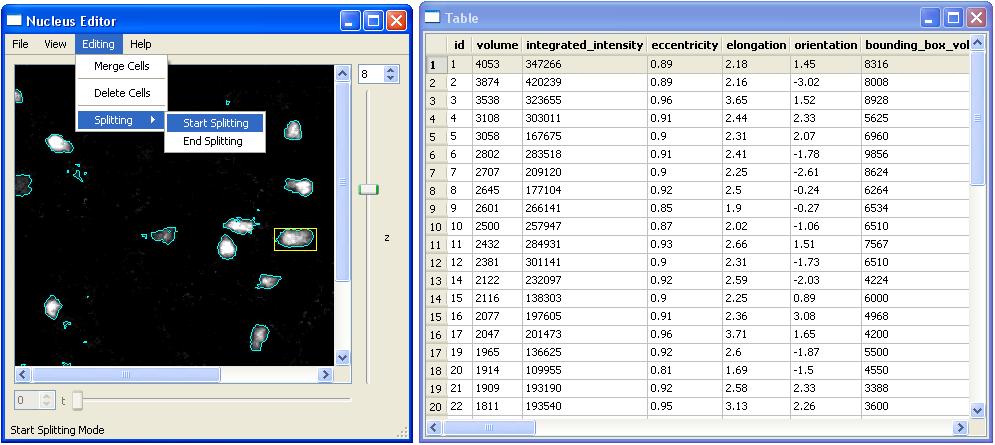
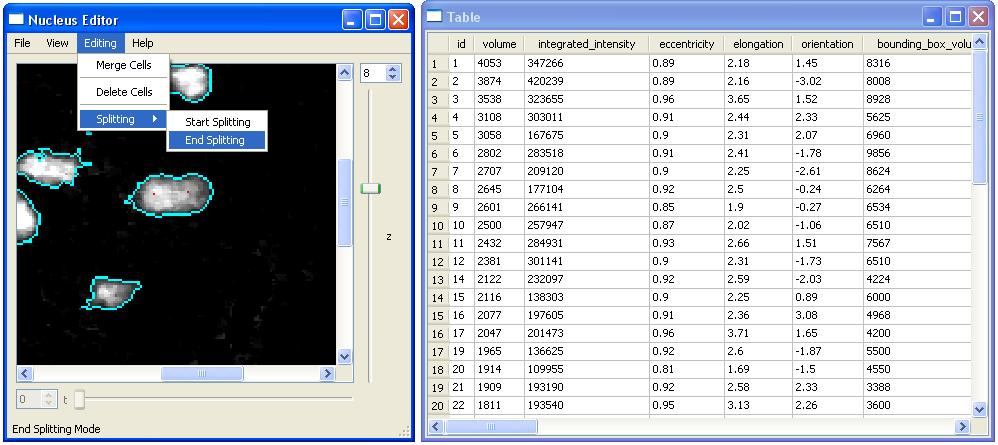
We start splitting operation with "Start Splitting" submenu item and select two seed points inside the cell. When we click on points in a cell these points will be colored with red. Once the seed points are ready we can split the selected cell by clicking on "End Splitting".
In the following example, We first choose "Start Splitting" to split the cell with id-1.
We first zoom in using the mouse and click on two seed points.
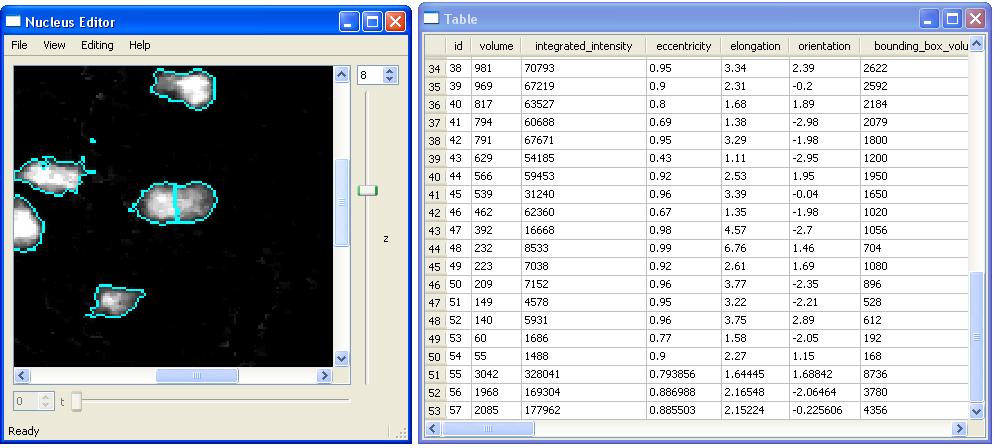
After splitting the cell with id-1, the splitted cell will be removed and two new cells (id-56 and 57) with new features will be added into the table and other views.
Edit-Based Validation - Group Editing
Since automated segmentation algorithms are not perfect, there is a compelling need to develop efficient methods to identify and correct the automated segmentation errors. Due to the large size of the datasets, the identification and correction of the cells to be edited have to be done very fast. In order to achieve this NucleusEditor implements kernel based pattern analysis algorithms where we can do group or cluster editing of multiple errors simultaneously. This dramatically reduces the amount of manual effort required compared to unassisted edit-based methods. We term this methodology PACE (Pattern Assisted Cluster Editing). By observing the nature of the errors and analyzing them, it can be possible to asses the performance of the algorithms used in NucleusEditor for this purpose and modify them to prevent such errors in the future. We explain ALISA and Group Editing in more detail at EVS and Validation Methods.
Once the corrected segmentation results are obtained with this way, hypothesis-driven and discovery driven research can be conducted by utilizing object features, associative object measurements, and the other tools that are part of the FARSIGHT_Toolkit.
This page was prepared by Aytekin Vargun (with Isaac Abbott's contributions)
