FARSIGHT Tutorials/Building Software/Bio-Formats/LinTutorial
This step-by-step guide is intended to be used by developers of the FARSIGHT and Bio-Formats projects. The goal of this tutorial is to download and build all the required source code and components for these two projects. At the end of this tutorial, you should be able to easily make modifications to the source code and rebuild your solutions.
This tutorial is specifically designed for Linux operating systems and was created on 64-bit Ubuntu 10.04.1 and 32-bit Unbuntu 10.10 which are available here. There are analogous tutorials for Windows and Mac.
If you only need to use FARSIGHT for image analysis and don't need to make modifications to source code see the user-only tutorial section.
If you have any problems during this process, please contact the bio-formats team.
Contents |
Cmake GUI Mini-Guide
This tutorial will be using cmake to generate platform-specific makefiles for the FARSIGHT components, and may be used in troubleshooting Bio-Formats components. This will be done via the cmake GUI. The cmake GUI is invoked using the command ccmake <path-to-source> from the target build directory in your terminal.
When you first run the ccmake command in an empty directory, you will have to press "c" to do an initial configuration. The GUI then displays all the relevant Keys and their Values for the current build. After any configuration, you may see an error message about a missing key. These are often pre-emptive - relating to keys that were just made available. Just press "e" to exit the error message and proceed to the actual Key/Value section of the GUI.
You can navigate the keys using up and down arrows. When you have selected a value you would like to modify, just press "enter." If it is a boolean value, that value will toggle. If it is a path/file variable, you can edit the path. Pressing up, down or enter again will return you to navigation mode.
When you are done modifying values, you press "c" to configure. Depending on what changes you made, based on dependencies to those changes new Keys may become visible and require values. Eventually, after you press "c" enough you will have an option to generate the makefile by pressing "g." This exits the GUI and returns you to the terminal command line. The current directory will now contain a makefile which can be executed via the command: make
Note: many of the keys you will need to modify are located in "advanced mode." Pressing "t" toggles between advanced mode. The only actual difference in advanced mode is that previously hidden keys are now visible.
Prerequisites
As this tutorial was written using a clean Ubuntu install, it makes no presumptions to pre-installed software. Throughout this tutorial, components will be installed using apt-get. Commands will be presented individually, but you can install multiple components with a single command from the terminal using:
sudo apt-get install <component 1> <component 2> <etc...>
Occasionally, after entering an apt-get command, you will be prompted to confirm your decision. Just type "y" and press enter to continue in these cases. You may also be prompted for the admin password to your system.
Before we start building FARSIGHT components, you should install subversion (used for checking out source code), G++ (a C++ compiler) and UUID. From your terminal, enter the following commands:
sudo apt-get install subversion
sudo apt-get install g++
sudo apt-get install uuid-dev
Environment Variables
The Bio-Formats ITK plug-in requires several environment variables to be set. You can permanently set these variables by editing the profile being used by your terminal, or they can be manually set for a given session using the command:
export <variable_name>=<new_value>
In addition, this tutorial will require an environment variable to be set. For convenience, this section serves as a reference place all of these variables and their values. If you have already set these variables, you may disregard instructions regarding them in the tutorial.
The variables are as follows:
- ROOT_DIR=<path_to_top_level>
- ITK_AUTOLOAD_PATH=$ROOT_DIR/loci/bioformats/components/native/bf-itk/build/dist/bf-itk/
- LD_LIBRARY_PATH=$ROOT_DIR/loci/bioformats/components/native/bf-itk/build/dist/bf-itk/
Farsight
Step 1: Organize your Directories
There is a significant amount of code for both of these projects, with a number of dependencies. It will be extremely helpful to organize your code in a meaningful way. Additionally, the instructions in this tutorial will assume a specific hierarchy of directories when indicating where to download or install certain components.
In particular, it is assumed that there is a specific <path to directory>/ where you will create a farsight/ and loci/ folder. A good path to use, if your username is jsmith, would be /Users/jsmith.
First we need to set an environment variable to this top-level directory. Whichever path you pick, from your terminal, execute the following command, replacing the angle-bracketed text with the path to your chosen top-level directory:
export ROOT_DIR=<path_to_top_level>
This allows us to use $ROOT_DIR in all future instructions when specifying target paths. Note: this tutorial assumes your <path_to_top_level> does not include a trailing "/".
Next, you should now create a series of folders representing the following directory structure:
Step 2: Download the Source Code
In this step we will download the source code for FARSIGHT and Bio-Formats, and the components upon which these projects depend (ITK, VTK, VXL and Jace).
Download and extract the following projects' source code into your $ROOT_DIR/farsight directory:
- VXL - Use version previous to current build. Last tested v 1.13.0
- ITK - Last tested v 3.20.0
- VTK - Last tested v 5.6.0
In your terminal, use the following commands to check out Jace, Bio-Formats and FARSIGHT, respectively, from their Subversion repositories:
svn checkout -r 39 https://jace.svn.sourceforge.net/svnroot/jace/trunk $ROOT_DIR/loci/jace
svn checkout http://dev.loci.wisc.edu/svn/software/trunk $ROOT_DIR/loci/bioformats
svn checkout svn://www.openworld.rpi.edu/repos/farsight/trunk $ROOT_DIR/farsight/farsight
Note: this will provide you with the most recent trunks of Bio-Formats and FARSIGHT. If you want to download all the branches, testing data, etc... remove the /trunk from the first command argument paths.
Note: Jace revision 39 is the most recently tested and confirmed revision that works with Bio-Formats. Later versions will break your builds.
Step 3: Install Supporting Software
We will be manually compiling code, using Cmake to manage the configurations. Thus you will need cmake and ccmake, the cmake gui. FARSIGHT requires QT and Boost; certain modules also require glut. You will also need a JDK, Ant and the Boost thread library for Bio-Formats. To install these components from your terminal, use the following commands:
sudo apt-get install cmake
sudo apt-get install cmake-curses-gui
sudo apt-get install openjdk-6-jdk
sudo apt-get install ant
sudo apt-get install freeglut3
sudo apt-get install freeglut3-dev
sudo apt-get install libqt4-dev
sudo apt-get install libboost-thread-dev
Now we can begin installing FARSIGHT components.
Step 4: Install VXL
In your terminal, navigate to $ROOT_DIR/farsight/farsight/build/vxl and execute the command:
ccmake $ROOT_DIR/farsight/vxl-1.13.0
to enter the cmake GUI. Press "c" to run the initial configuration, then "t" to toggle to advanced mode.
Ensure the following keys are set to OFF:
- BUILD_BRL
- BUILD_CONVERSIONS
- BUILD_EXAMPLES
- BUILD_GEL
- BUILD_OUL
- BUILD_OXL
- BUILD_PRIP
- BUILD_TBL
- BUILD_TESTING
64-bit OS Note: Also set the following:
- CMAKE_CXX_FLAGS = -fPIC
- CMAKE_C_FLAGS = -fPIC
Press "c" to configure after making these changes. Keep pressing "c" until you are able to generate the makefile. Press "g" to generate the makefile. After being returned to the command line, use the command:
make
to build VXL.
Step 5: Install ITK
In your terminal, navigate to $ROOT_DIR/farsight/farsight/build/itk and execute the command:
ccmake $ROOT_DIR/farsight/InsightToolkit-3.20.0/
to enter the cmake GUI. Press "c" to run the initial configuration, then "t" to toggle to advanced mode.
Ensure the following keys are set to OFF:
- BUILD_TESTING
- BUILD_EXAMPLES
- BUILD_DOXYGEN
Ensure the following keys are set to ON:
- BUILD_SHARED_LIBS
- ITK_USE_SYSTEM_VXL
Press "c" to configure after making these changes. You will probably see an error about the VXL_DIR. Press "e" to return to the cmake GUI.
Set:
- VXL_DIR = $ROOT_DIR/farsight/farsight/build/vxl
Keep pressing "c" until you are able to generate the makefile. Press "g" to generate the makefile. After being returned to the command line, use the command:
make
to build ITK.
Troubleshooting
On 64-bit Ubuntu you may see the error:
relocation R_X86_64_32 against `__gxx_personality_v0' can not be used when making a shared object
If so, return to step 4 and rebuild VXL except this time, set the following additional variables:
- CMAKE_CXX_FLAGS = -fPIC
- CMAKE_C_FLAGS = -fPIC
Step 6: Install VTK
In your terminal, navigate to $ROOT_DIR/farsight/farsight/build/vtk and execute the command:
ccmake $ROOT_DIR/farsight/VTK
to enter the cmake GUI. Press "c" to run the initial configuration, then "t" to toggle to advanced mode.
Ensure the following keys are set to OFF:
- BUILD_DOCUMENTATION
- BUILD_EXAMPLES
- BUILD_SHARED_LIBS
- BUILD_TESTING
- VTK_USE_SYSTEM_JPEG
- VTK_USE_SYSTEM_TIFF
- VTK_USE_SYSTEM_ZLIB
Ensure the following keys are set to ON:
- VTK_USE_BOOST
- VTK_USE_GUISUPPORT
- VTK_USE_QT
Press "c" to configure after making these changes. Keep pressing "c" until you are able to generate the makefile. Press "g" to generate the makefile. After being returned to the command line, use the command:
make
to build VTK.
Step 7: Build FARSIGHT Modules
In your terminal, navigate to $ROOT_DIR/farsight/farsight/build/ftk and use the command:
ccmake $ROOT_DIR/farsight/farsight
to enter the cmake GUI. Press "c" to run the initial configuration. You may see an error message about being unable to build without ITK. Press "e" to proceed to the GUI, then "t" to toggle to advanced mode.
Set:
- ITK_DIR = $ROOT_DIR/farsight/farsight/build/itk
Press "c" to configure. You may see an error message about VTK not being found. Press "e" to return to the GUI.
Set:
- VTK_DIR = $ROOT_DIR/farsight/farsight/build/vtk
Press "c" to configure.
Ensure the following keys are set to OFF:
- BUILD_EXAMPLES
- BUILD_TESTING
There are a series of keys corresponding to the FARSIGHT modules - any or none of which can be turned ON or OFF, at your preference. This tutorial only assumes BUILD_NUCLEI = ON.
Press "c" to configure until you are able to generate. Press "g" to generate. After being returned to the command line, use the command:
make
to build the indicated FARSIGHT modules.
Step 8: Test Nuclei Editor
From the command line, the Nuclei Editor can be opened via:
$ROOT_DIR/farsight/farsight/build/ftk/exe/NucleusEditor
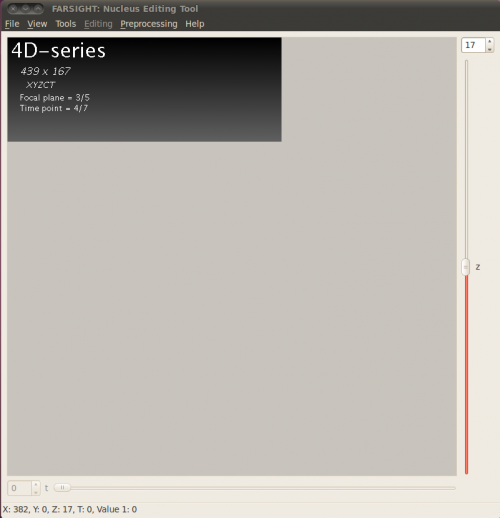
When the editor opens, you can open supported file types via the Ctrl+O shortcut. Verify that you can open an image with the Nucleus Editor.
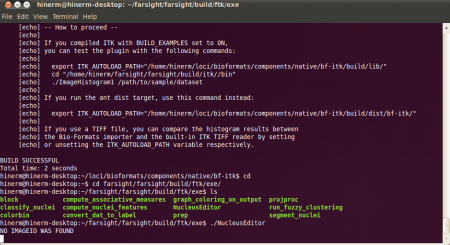
Note: multidimensional images are not fully supported (the time-slice slider probably will not work) and if you try to open a file type not natively supported, you will see the message "NO IMAGEIO WAS FOUND" in your terminal. This is because FARSIGHT is built on ITK, which uses a plug-in system. When opening an image, the ITK_AUTOLOAD_PATH environment variable is checked for supporting plug-ins to see if there is an available plug-in that can open the current image type.
Lacking a plug-in, a limited number of formats are supported natively. In the next section of this tutorial, we will build the Bio-Formats plug-in, which will allow processing additional file types.
Bio-Formats
Step 9: Install BF-CPP
FARSIGHT modules are written in C++ while Bio-Formats is written in Java - this requires an intermediary to translate between the languages. We use Jace to create C++ proxies for Java methods, then the actual BF-ITK plug-in uses these bindings in its image processing. In this step we will create the C++ bindings.
In your terminal, navigate to $ROOT_DIR/loci/bioformats and execute the command:
ant tools
then navigate to $ROOT_DIR/loci/bioformats/components/native/bf-cpp and execute the command:
ant -Djace.home=$ROOT_DIR/loci/jace
Troubleshooting
On 64-bit operating systems your build may fail during compilation with an error along the lines of: libboost thread-mt.a(thread.o): relocation R_X86_64_32 against 'tls destructor' can not be used when making a shared object. In this case, you have two options:
- Manually compile your Boost library with -fPIC flags set for your C and CXX compiler
- Navigate to
$ROOT_DIR/loci/bioformats/components/native/bf-cpp/buildand run the command:
ccmake ..
- then press "t" to toggle to advanced mode. Change the entries Boost_THREAD_LIBRARY and Boost_THREAD_LIBRARY_RELEASE file extensions from <path>.a to <path>.so. e.g. if your original value was /usr/lib/libboost_thread-mt.a it should be changed to /usr/lib/libboost_thread-mt.so. Press "c" to configure with the new settings then "g" to generate the makefile. When returned to the command line, use the command
make
- to build BF-CPP.
- For any other issues, review the specific BF-CPP guide.
Step 10: Build BF-ITK
In this step we will install the Bio-Formats ITK plug-in, allowing ITK-based modules to open new image formats.
First, navigate to $ROOT_DIR/loci/bioformats/components/native/bf-itk and execute the commands:
ant -Djace.home=$ROOT_DIR/loci/jace -Ditk.home=$ROOT_DIR/farsight/farsight/build/itk
ant -Djace.home=$ROOT_DIR/loci/jace -Ditk.home=$ROOT_DIR/farsight/farsight/build/itk dist
Note: if you need to rebuild BF-ITK you can combine the commands into:
ant -Djace.home=$ROOT_DIR/loci/jace -Ditk.home=$ROOT_DIR/farsight/farsight/build/itk compile dist
Step 11: Using BF-ITK with FARSIGHT
For BF-ITK to be recognized as an ITK plug-in, you'll need to set the ITK_AUTOLOAD_PATH environment variable. Your target directory should contain these files:
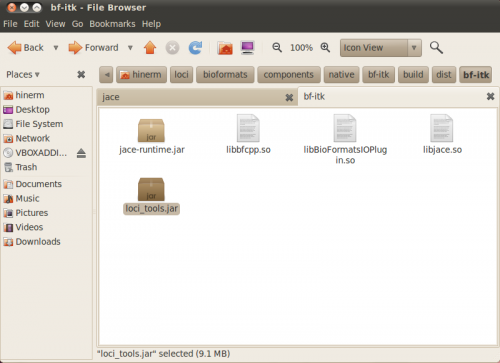
From your terminal, use the following command:
export ITK_AUTOLOAD_PATH=$ROOT_DIR/loci/bioformats/components/native/bf-itk/build/dist/bf-itk/
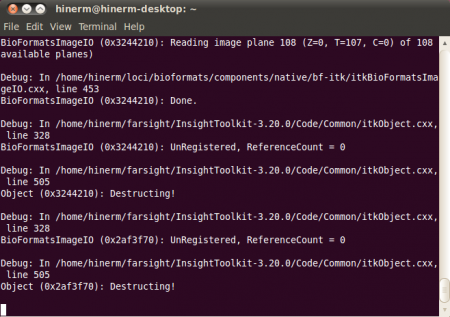
Then open the NucleusEditor as you did in step 4. When you open an image you should see a series of debug statements in the terminal which provide some general information about the image being opened. In the Editor itself, T and Z slices should now be separated properly.
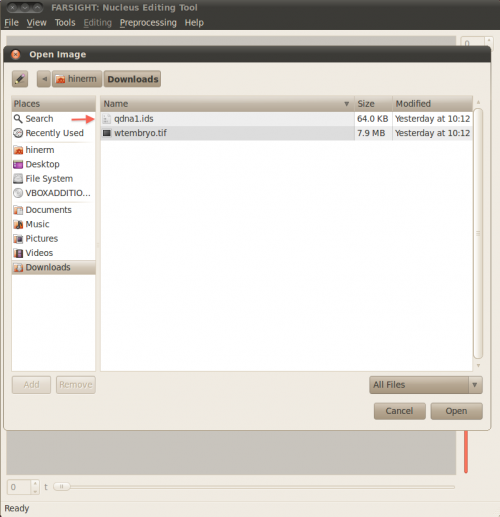
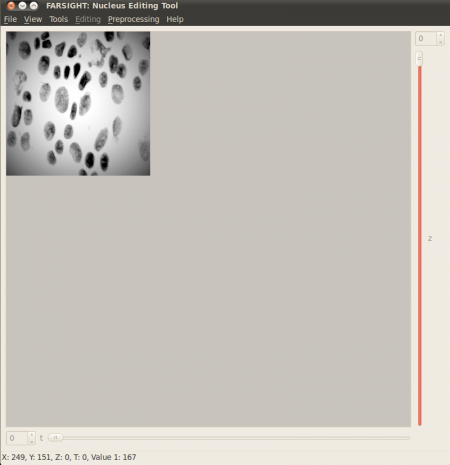
You can now open any image type supported by Bio-Formats. In the following sequence of images, a *.ids format image is opened with the Nucleus Editor using Bio-Formats. Then, the BF-ITK plug-in is turned off with the terminal command
export ITK_AUTOLOAD_PATH=""
and the same image is opened again:


